Wednesday, June 19, 2013

Crispy, yet fluffy GF Waffles with Rhubarb Sauce and Strawberries


Recently when I wanted to make waffles for breakfast my husband implored me to find a recipe that was crispy on the outside and light and fluffy on the inside. He doesn't eat gluten free now that Lent is over (we gave up gluten for Lent:), but I am still trying - I feel better when I avoid it. Oh yeah, back to the waffles...I found a recipe for crispy fluffy waffles, so I gave it a try - he was happy. I tried it with GF flours and wasn't quite as happy, but made some adjustments and have found a new favorite waffle recipe. The first time I made these waffles I only used one egg white, but since the little guy needed some breakfast too I decided to cook him up an egg yolk and use the extra white in the waffle batter.

Rhubarb and strawberries are in season now, so we ate our breakfast waffles sans our usual maple syrup and avec rhubarb sauce and sliced strawberries. The end result...magnifique! Oh and I had a couple leftover that I ended up using to make myself a PB&J sandwich for lunch - I sometimes crave them and have not found a good GF bread recipe as of yet. Well, I have not really tried as I am already awful at making yeast bread...so I stick to "quick" breads and usually do much better.

Crispy & Fluffy Gluten Free Waffles

Ingredients

  • 1/4 cup almond flour
  • 1/4 cup brown rice flour
  • 1/4 cup buckwheat flour
  • 1/4 cup tapioca flour
  • 1 T cornstarch or arrowroot powder
  • 2 tsp baking powder (gluten free)
  • 1/2 tsp salt
  • 1/4 tsp baking soda
  • 3/4 cup buttermilk
  • 1/4 cup milk
  • 6 - 8 T oil (any combo of coconut and light olive oil)
  • 1 large egg, separated (+ an extra egg white - optional)
  • 1/2 tsp vanilla

Directions

  1. Combine dry ingredients (almond flour through baking soda), mix to combine and set aside.
  2. Melt coconut oil, if solid, and add buttermilk, milk and vanilla. Separate egg(s), adding yolk to liquid mixture. I like to use a large spouted measuring cup for the liquid mixture and add the dry ingredients to it, but you could add the liquid to the dry and stir to combine. Allow the batter to rest while you whip up the egg whites.
  3. Whip the egg whites with a mixer or by hand (this will take awhile by hand, but is possible) until soft peaks form. Gently fold the egg whites into the batter.
  4. The egg whites will make the waffles nice and fluffy and the oil will make them crispy. So, start with 6 T of oil and add more if they are not crispy enough.
  5. Pour the batter into your hot waffle iron and cook until crispy. Place on a cookie sheet and into a 200 degree preheated oven to keep the waffles warm. Makes 8-10 square waffles.
Prep Time: 20 min Cook Time: 20 min Ready in: 40 min
Click to add this recipe to your Recipe Book

*My notes: It is easy to make your own buttermilk and creme fraiche (sour cream) from buttermilk starter and milk or buttermilk and heavy cream. I like to buy a half pint of buttermilk (not ultra pasteurized) and add it to milk to make more buttermilk or add it to heavy cream (check the ingredient label to make sure there are no other ingredients besides cream and that it is not ultra pasteurized) to make sour cream. Pour 1/4 cup buttermilk into a glass jar, add 1-2 cups milk or cream, shake to mix thoroughly and leave out on the counter for 24 hours to thicken. Then refrigerate. Voila - buttermilk and creme fraiche, without added ingredients like carrageenan.

For the Rhubarb Sauce, combine about 2 cups of chopped rhubarb with 1/2 cup honey and 1-2 T water. Bring to a boil then allow to simmer until all of the rhubarb has softened. Check for desired sweetness - should be just barely sweet and still quite tart. Optional - add a dash or two of cinnamon.

This post is part of Real Food Wednesdays and Simple Lives Thursday.

Wednesday, June 12, 2013

CSA 2013 Season!

CSA Week 2

Our CSA (Community Supported Agriculture) started three weeks ago! I had hoped to start blogging again when the farmers markets opened or at least when our CSA started so I could post some ideas for all the seasonal veggies (and soon some fruits too) that are available at the farmers markets. But, life gets in the way...I'll try to remember what I did with most of our produce from the first two weeks of our CSA and ideas for this next week.

CSA Week 1
Let's see, Week 1 we received some leaf lettuce, spinach, radishes, rhubarb and two different kinds of chinese cabbage (pac choi and joy choi). We tried a Choi stirfry with cashews over rice and this yummy pasta dish, adding pine nuts that definitely increased the deliciousness (and nutritional value with more protein). Some of the rhubarb was used in a sourdough coffee cake and I still need to make something with the rest of it. The radishes were eaten with salt or on salads and most of the lettuce and spinach were used for various salads. Including one of our favorite wilted spinach salads, pictured here with strawberries, caramelized onions bacon and blue cheese.

Wilted Spinach Salad

Week 2 provided us with more chinese cabbage, spinach and leaf lettuce along with kohlrabi (greens not pictured as I used them the same night I received them and forgot to take the picture until later), a gorgeous head of butter crunch lettuce, and kale. This time the chinese cabbage was used to make a wonderful Bok Choy Salad that we took to a church potluck event. The kohlrabi was so tender, it left us craving more; we just sliced it up and ate it with salt. I used the kohlrabi greens in my rice and beans with greens and fried eggs meal - they were excellent! I'm trying hard to give up gluten so I've been using the buttercrunch lettuce to make lettuce wrap "sandwiches" for lunches. This Kale Salad was on my list of things to make, but wasn't quite as good as I had hoped. There are plenty of other kale salads that we prefer. With some of the spinach we made this curry dish, but would have like to have made this one if I had coconut milk in my cupboard. Also on my list of things to make is this Thai Crunch Salad with some adjustments of course, I wish I would have saved some of the chinese cabbage, but it will work well with lettuce and spinach. The leaf lettuce and spinach have gone into many salads and on sandwiches.

Please share your favorite seasonal recipes with me so I can try them too!

This post is part of Simple Lives Thursday and Real Food Wednesdays.

Monday, November 12, 2012

Healthy Weight & Cancer Treatment (guest post)

 As I sit in the hospital with my newborn son who developed a fever at 5 weeks old, I am disappointed with hospital food. It lacks flavor, nutrients and much needed fat in my opinion! I am only a nursing mother trying to help my baby recuperate, but there are many children and adults in this hospital that are eating off the same menu that I have been given. Leafy greens - none, just iceberg lettuce. Fresh fruit, some, but more canned/processed fruit than fresh. Vegetables - the usual and mostly starchy. Probiotics/cultured food - yogurt (99% fat free). International fare = pasta, stir fry, and Mexican options.Along my Real Food journey I have come to believe that your health has a lot to do with what you eat.  Here to tell us more about how important what you eat during cancer treatment is Jillian McKee. Now, how do we get hospitals to change their menus to coincide with what patients need? Maybe some hospitals are better than others. If you have a good report to make on a hospital menu, please share in the comments below.  
Jillian McKeeBringing a wealth of personal and professional experience to the organization, Jillian McKee has worked as the Complementary Medicine Advocate at the Mesothelioma Cancer Alliance since June of 2009. Jillian spends most her time on outreach efforts and spreading information about the integration of complementary and alternative medicine when used in conjunction with traditional cancer treatment.


Maintaining a Healthy Weight During Cancer Treatment

Dealing with cancer can be a scary experience. Most forms of cancer have painful side effects and many cancer treatments, such as chemotherapy and radiation, can be just as uncomfortable as the disease itself. Cancers such as mesothelioma, which affects the lining of the body’s vital organs and is caused by asbestos exposure, can be especially agonizing. Mesothelioma side effects include shortness of breath, pain during breathing, and a persistent wheezing cough. Most cancers can be treated with a combination of surgery, chemotherapy, and/or radiation. A common side effect for most types of cancers and their treatments is weight loss. Because of this, it is important to maintain a healthy weight and pay attention to proper nutrition so that your body stays strong.

Because both cancer and its treatments weaken the body, making sure you get the necessary vitamins and minerals is an important part of the healing process. Because the body is under attack by both the cancer itself and the treatment, cancer patients usually need more protein than the average person to maintain their energy. Therefore, when undergoing cancer treatments, it’s important to eat foods that are high in protein such as eggs, dairy products like milk, cheese and yogurt, and beans. Peanut butter is also a good source of protein and is easy on the stomach for patients who experience nausea during treatments.

Most cancer patients experience weight loss due to nausea and loss of appetite often caused by chemotherapy. Increasing calorie intake may not sound healthy, but if you have cancer, you need all of the calories you can get.  One way to eat more to avoid weight loss is to use extra spices in your food. Many cancer patients undergoing treatment complain that food tastes bland, which causes them to not want to eat as much. By adding flavor to food with strong spices like oregano, curry, and cinnamon, your meals will taste stronger and better and this will help you consume the foods needed to stay strong. Some dieticians even recommend eating high fat foods during chemotherapy to maintain caloric intake. So, while it should be done in moderation, don’t be afraid to indulge in ice cream, pizza, or a cheeseburger.

Sometimes, even if you use spices in your food and eat high-calorie meals, you still may not be getting the nutrients you need due to constant nausea. If this is the case, try eating foods that are easy on the stomach and reduce nausea naturally such as ginger, rice, and potatoes. If eating a large meal makes your nausea worse, try snacking on several small meals throughout the day. Carry snacks with you so that if your stomach begins to feel better, you can munch on some much-needed calories while you can.


For more information on this subject or similar topics, check out Jillian's blog at: http://www.mesothelioma.com/blog/authors/jillian/

 Here are some of my favorite recipes that are high in protein, nutrients and flavor...


Monday, November 5, 2012

Our Newest Addition


The waiting is over! Our third child has arrived...it's a boy! Adler Kohlaiah Del Balso (aka Little Man Adler, his brother's nickname for him) entered this world on Wednesday, October 3, 2012 at 11:20pm. We had a wonderful waterbirth at home after an unexpected long labor (20+ hours). We enjoyed our family time together while Ryan was home on paternity leave. And are now getting used to life with a newborn once again.

I'm hoping to get back to blogging soon...I have so many recipe ideas to share. Unfortunately I've missed most of the gardening/season of plenty, but I still have some fall ideas to share and I even have a guest blogger lined up to share a post.

Saturday, June 16, 2012

Berry Season - Strawberry Cream Pie


Wow, it has been over a month since I posted anything. I had hoped to keep posting my weekly meal plans at least, but I've been lacking motivation. Pregnancy seems to do that to me, not to mention my husband's surgery and him being home for two weeks that really threw off my routines (but also enjoyed immensely).

Last week I finally got to go strawberry picking with my kiddos. I had hoped to pick two flats, but was getting a bit sore after just one. Then I heard someone say that they may not be open for picking again after that day. Suddenly I was motivated to pick two flats worth, ending up with just over 20 lbs of strawberries.

We were lucky to have a two day break from the heat, so I got to work right away making strawberry jam and fruit leathers/fruit roll-ups (they were fairly thin, and I rolled them up, so they were definitely more like fruit roll-ups than fruit leathers). We ate (and are still eating) a bunch of strawberries fresh, we have some in the freezer for baking and some for smoothies. My daughter finally got the pink ice cream she has been requesting for some time - fresh, homemade strawberry ice cream is hard to beat! Yesterday I created a Strawberry Cream Pie for a cookout and bonfire we hosted for our Bible Study. It was refreshing, creamy and DELICIOUS! For Father's Day I might make a strawberry mousse pie with a chocolate cookie crust (or we may just have strawberry ice cream).

After looking through a variety of strawberry pie recipes I hadn't found anything that really caught my eye or met all the desires that I had for the fresh, creamy strawberry pie that I was envisioning/craving. I took a chance and created one taking bits and pieces from various recipes that sounded interesting. The result was just what I hoped it would be.


Strawberry Cream Pie

Ingredients

Crust

  • 7 Whole Graham Crackers*, crushed
  • 1/2 cup Soaked & Dried Almonds, toasted
  • 1/4 cup Coconut oil (or butter), melted
  • 2 Tablespoons Sweetener of choice (dry would probably work best - turbinado, sucanat, palm, etc.)

Filling

  • 8 oz Cream Cheese or Yogurt Cheese, softened
  • 5 Tablespoons Maple Syrup, divided
  • 1 teaspoon Vanilla
  • 3/4 cup Heavy Whipping Cream
  • 1 Tablespoon Unflavored Gelatin
  • 1/4 cup Water, cold
  • 1/2 cup Water, boiling
  • 2 + cups Fresh Strawberries, crushed
  • 1 Handful of strawberries for decorating pie

Directions

  1. Preheat oven to 350 degrees.
  2. For the crust, crush graham crackers in food processor and empty into a small bowl. Grind almonds in food processor until fine, add to graham cracker crumbs. Add sugar to almonds and graham crackers. Melt coconut oil (or butter) and pour over crust ingredients. Mix until thoroughly combined. Press into a deep dish pie plate. Bake for 10 minutes and allow to cool on cooling rack.
  3. Remove stems and wash strawberries. Use a potato masher to crush strawberries, set aside.
  4. Whip heavy cream with vanilla and 2 T maple syrup until stiff peaks form. Place whipped cream on top of crushed strawberries, but do not mix yet. Set aside in refrigerator.
  5. Sprinkle packet of gelatin over 1/4 cup cold water and let sit for one minute. Rinse out mixing bowl and beat cream cheese with 3 T maple syrup. Add 1/2 cup boiling water to gelatin and cold water; stir to dissolve. Slowly add gelatin water to cream cheese mixture while mixer runs at a low speed.
  6. When water and cream cheese mixture are fully combined (should be very watery) add to whipped cream and strawberries. Fold ingredients together. Pour into cooled graham cracker crust and refrigerate for at least two hours.
  7. Prior to serving slice remaining strawberries and place around edge of pie and in the center (for decoration). Eat slowly to fully enjoy!
Prep Time: 3 h Cook Time: 10 min Ready in: 3 h 10 min
Click to add this recipe to your Recipe Book
Strawberry Cream Pie courtesy of Jamie Del Balso.

*My notes: I've always loved graham crackers, but am not a fan of the ingredients in most traditional brands and I haven't gotten around to making my own yet. I do, however, like the Back to Nature graham crackers or New Morning as they have all natural and wholesome ingredients. Here are some recipes to try and make your own: GNOWFGLINS, Smitten Kitchen, 101Cookbooks, The Nourishing Homemaker (gluten & dairy free), Deliciously Organic, Heavenly Homemakers.

Wednesday, May 9, 2012

Homemade Raisin Bran


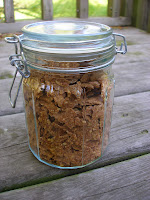
I was probably one of those odd kids whose favorite cereals were Raisin Bran and Cracklin' Oat Bran growing up. But since I have given up boxed cereal I have been craving something other than granola as a quick, easy and portable breakfast. Then I thought about it one day - why not make my own bran flakes and add raisins to it. I had thought about trying completely from scratch on my own, but did a recipe search online first and found that there were in fact many recipes out there. I tried one from Mr. Breakfast, that I adapted slightly the first time. It was okay, but it needed some tweaking. My second batch was much better, which was good news since I doubled the recipe. So, here is what I came up with.


Oh and the soaking part of this is not necessary, but will provide you with more nutrients than you would get without soaking. Also, if you don't have a dehydrator, you can bake it in the oven - I'd say at the lowest temperature, but I've read that anything over 170 degrees is killing some of the nutrients anyway - so no need for soaking if you are going to cook away all those additional nutrients.

This post is part of Real Food Wednesday; Whole Foods Wednesday; Simple Lives Thursday and Creative Juice.


Homemade Raisin Bran

Ingredients

  • 1/2 cup Bran
  • 1/2 cup Oats, processed until fine
  • 1/3 cup Almonds, finely ground
  • 3 Tablespoons Honey
  • 1 Tablespoon Molasses
  • 1/3 cup Milk
  • 1/4 cup Water
  • 1/4 teaspoon Baking Powder
  • 1/4 teaspoon Salt
  • 1 Raisins to taste

Directions

  1. Combine bran through water and mix thoroughly. Soak overnight in a glass bowl covered with a towel or plastic wrap.
  2. In the morning sprinkle with salt and baking powder and mix to combine thoroughly.
  3. Using parchment paper or a Silpat underneath and a piece of plastic wrap on top, roll out the batter as thin as possible to create one large flake.
  4. Place in dehydrator (anything under 150 would be best) or in oven (300 degrees) until crisp. In the oven you may need to flip the large flake over to get both sides sufficiently crisp; check on it frequently.
  5. Break into small pieces and add raisins (and milk) to taste.
Prep Time: 9 h Cook Time: 5 h Ready in: 14 h
Click to add this recipe to your Recipe Book
Homemade Raisin Bran courtesy of Jamie Del Balso.

Monday, May 7, 2012

Menu Monday 5/7/2012


This Week’s Meal Plan 5/7 – 5/13

Last week’s vacation was wonderful! Despite having rain nearly every morning, we still had sun and dry weather every afternoon and sometimes in the late morning too. The rain was usually light and we were still able to take hikes in the rain. The kids spent most of their days outdoors – riding horses, playing with the dogs, helping Opa with a project or Oma with the horses, taking rides on Opa’s new tractor or on the four wheeler, fishing and lots of hiking! Our menu varied a bit from what I thought we might have, one night we had a wonderful walleye fish fry with oven fries along with a salad and another night we had tacos with refried beans and rice. My mom sent me home with one of the pot pies she had made and both my dad and his friend got their turkey. My dad’s friend doesn’t care too much for eating wild game, but enjoys hunting so we took home about half of it and get to try wild turkey for the first time this week.

Breakfast
Soaked and Dehydrated Granola with Yogurt; Spelt Pancakes and Sausage; Homemade Raisin Bran; Eggs and Bacon; Irish Oats with nuts; Cottage Cheese Pancakes; Muffins with Smoothies

Lunch
Leftovers; Sandwiches; Hot Dogs or Brats; Quesadillas

Snacks
Fruit and String Cheese; Trail Mix; Cheese and Pretzels; Pistachios; Popcorn with nutritional yeast; Banana Flax Muffins; RaspberryRhubarb Quinoa Muffins (didn’t get to this before our trip last week)

Dinner
  • Friday: Hamburgers and Salad
  • Sunday: Pizza and salad 

Please share your favorite lunch ideas, we are always looking for new ideas. Later this week I hope to share my Homemade Raisin Bran recipe.