Showing posts with label main dish. Show all posts

Thursday, April 12, 2012

Grilled Carne Asada


Ryan and I love Mexican food. Unfortunately we have not found a GREAT (authentic) Mexican restaurant in our current city, though we have tried. The first time we tried Carne Asada (and were blown away at how good it was), we were in an unlikely location for finding GREAT Mexican food. We were way up in the mountains of Colorado in Glenwood Springs. Sorry, I can't remember the name of the restaurant, one of our hotel staff (who happened to be Hispanic) suggested it to us. And rather than eating our typical favorites, Ryan decided to ask what the waiter recommended and went with it. It was by far the best Mexican meal we have eaten, in the USA. Since then we have tried the same meal at other Mexican restaurants, but have not had anything nearly as good.

I finally decided to try making it myself. After looking through several recipes online I decided to create my own - none of them sounded quite like what we had in Colorado. The result - quite tasty, if I do say so myself. This was the second time I have made it and each time I learn a little something. If you like Mexican, it is definitely worth a try! This meal can easily be made gluten free by serving with corn tortillas instead of flour. Scroll down past the Carne Asada recipe for two bonus condiment recipes:)

Grilled Carne Asada

Ingredients

  • 1 1/2 lb Skirt or Flank Steak (or Venison), sliced thin
  • 1/2 Onion
  • 1 handful Cilantro
  • 2 + cloves Garlic, minced
  • 1 Orange, juiced
  • 1 - 2 Limes, juiced
  • 1/2 teaspoon Salt
  • 1/2 teaspoon Cumin
  • 1/4 teaspoon Cayenne Pepper, 1/2 tsp chili powder, or 1 jalapeno (depending on preferred heat level)
  • 1/4 cup Olive Oil

Directions

  1. To ensure thin slicing of meat, put in freezer for an hour or so if fully thawed. Meat tends to be easier to slice thin when slightly frozen.
  2. To make marinade, combine onion through Cayenne pepper in a food processor and process until fine. Stir in olive oil.
  3. Place thinly sliced meat into marinade, stirring to coat and refrigerate for at least an hour, but up to eight.
  4. Preheat grill to high. Oil grill grates to prevent sticking. Meat will not take long to cook, about 2 minutes on each side as it is very thin.
  5. Serve with tortillas, refried beans, grilled onions (green or regular), grilled peppers, sour cream and guacamole. Salsa is optional - it doesn't come with the meal in a restaurant, but is always on the table.
Prep Time: 4 h Cook Time: 10 min Ready in: 4 h 10 min
Click to add this recipe to your Recipe Book
Carne Asada courtesy of Jamie Del Balso.


Fresh Salsa
 6 ripe tomatoes, I like to use Romas because they are a bit less juicy, quartered
1/2 sweet pepper, green pepper or jalapeno
1/2 onion
1-2 cloves of garlic
1 large handful of cilantro
1/2 of lime, juiced
salt to taste

Combine pepper, onion and garlic in food processor and process until it reaches your desired consistency. Remove and place in a bowl. Add quartered tomatoes and cilantro, pulse until tomatoes reach desired consistency. Combine tomatoes with onion mixture add salt and lime juice and voila - Fresh Salsa, without all the chopping by hand. You can do the chopping by hand if you prefer an even chunkier salsa. I do it both ways, depending on my mood.

Guacamole
2 avocados, ripe
2 Tblsp fresh salsa (see above)
1 clove garlic, minced
salt to taste

Mash avocados, add fresh salsa, minced garlic and salt to taste. If you want Guacamole for a crowd, double or triple the above recipe. Note: If you don't have the above ingredients for salsa, at least add some lime juice and  potentially fresh chopped cilantro and fresh chopped ripe tomatoes. Oh and I have been known to make guac in my food processor after making salsa - if I need to make a large quantity.

This post is part of Real Food Wednesday, Simple Lives Thursday, It's a Keeper Thursday, These Chicks Cooked, Creative Juice, and Gluten-Free Wednesday.
  

Wednesday, March 28, 2012

Crockpot Indian


Chicken Tikka Masala and Mattar Paneer are my two favorite dishes to order at an Indian restaurant, although I am not sure how authentic the first is. When we were in India I was never able to find it on a menu and Americans living in Bangladesh and India had not heard of it. Anyway, this recipe is kind of a combination of both of my favorite dishes. I have made a more traditional Chicken Tikka Masala, but it is a bit of work with the marinade and skewers and grilling, so I much prefer this easier crockpot version. You can also do it with bone-in chicken pieces (layering the sauce, chicken, and cauliflower in your crockpot), but the paneer is just so much easier.

If you do not have access to an Indian grocery store and cannot find paneer in your area, you could always make your own using milk and lemon juice. I have not yet done this, but maybe I will someday, just to see what it is like. If you do have access to an Indian grocery store, pick up a can of pureed mango while you are there and use it to make Mango Lassi to go with your meal (plain yogurt, mango puree, water to thin, and sugar or honey to taste - blend until smooth). Oh and freeze the left-over mango puree for more Mango Lassi or Mango Margaritas:)

Due to my children eating this meal, we do not make it very spicy. If you want more spice, feel free to add a chopped jalapeno with the garlic and ginger.

It is definitely worth the time to make some Whole Wheat Chapatis (Roti) to go with the meal, and I recommend letting the flour mixture sit for 2 hours or more (when I remember to start early enough, I do this). And I've tried the dry skillet method, but it doesn't work well for me, so I use an oil sprayer to coat the pan before each Chapatis goes in. Here is another recipe from one of my favorite Food Network Hosts, for Indian Griddle Breads (aka Chapatis).

Paneer Mattar Masala

Ingredients

  • 1 Package of Paneer
  • 3 Tablespoons of Olive Oil
  • 1 Large Onion, chopped
  • 3 Cloves Garlic, pressed
  • 1 Tablespoon Chopped Fresh Ginger
  • 1 1/2 Teaspoons Ground Coriander
  • 1 Teaspoon Turmeric
  • 2 Teaspoons Ground Cumin
  • 2 Teaspoons Paprika
  • 1/2 Teaspoon Red Pepper Flakes
  • 1/2 Teaspoon Cinnamon
  • 28 oz Can Crushed Tomatoes
  • 1/2 Juice of, Lemon
  • 1/2 Head of Cauliflower, broken into small florets
  • 1 Cup Frozen Peas (thawed or frozen)
  • 1 Salt to Taste
  • 1/2 Cup Heavy Whipping Cream

Directions

  1. Cut the paneer into bite sized pieces and set aside. (I typically only use half of a block and freeze the other half for another time or another recipe.)
  2. In a skillet, heat 3 Tablespoons of olive oil over medium heat and add the chopped onion.
  3. While onion is softening, mix together the dry spices in a small bowl.
  4. Add the paneer to the onions and brown slightly then add the garlic and ginger. Once this is fragrant add the dry spices and mix thoroughly to coat.
  5. Stir in the crushed tomatoes and lemon juice. (The original recipe calls for using an immersion blender or blending about half of the sauce, but I just keep it thick - do what you like. If you do want to blend it, then don't brown the paneer with the onions; add it after the sauce is blended.)
  6. In your crockpot combine the sauce, (paneer if blending sauce), and cauliflower.
  7. Because the original recipe called for chicken, the instructions were to cook on high for one hour and then low for 4 - 4 1/2 hours, but with paneer that is not necessary. If you want to cook this all day, while you are at work - then I would put it on low and cook for the entire day. If you have much less time or want to start it in the middle of the day (say during nap time) then cook on high for an hour or so and turn to low until cauliflower is at desired tenderness.
  8. Add the peas during the last half hour of cooking.
  9. Before serving, stir in the Heavy Cream, use as much as desired. If you don't have cream, half and half or whole milk will also work, but my preference is the creaminess of the heavy cream.
  10. Serve over rice and with Whole Wheat Roti/Chapatis.
Prep Time: 30 min Cook Time: 5 h 30 min Ready in: 6 h
Click to add this recipe to your Recipe Book
Paneer Mattar Masala courtesy of Jamie Del Balso.

This post is part of Real Food Wednesdays and Simple Lives Thursday.

Wednesday, March 21, 2012

Super Simple Grilled Fish


I honestly cannot tell you where exactly the inspiration for this main course came from. On one of my recipe searches I found a recipe for fish using fresh herbs. And this is what I ended up with. We make this quite often as it is super simple and incredibly tasty! Our whole family loves it. The kids even request to eat the lemons.

Early in our marriage I discovered Steelhead, a type of trout that is more like Salmon than trout. Ryan has never been a huge Salmon fan, but he does like Salmon. And since Steelhead does not have added coloring, but still has the pink color that Salmon has, we often end up with Steelhead, not to mention that it is often less expensive. If you have a different favorite fish, feel free to substitute that in place of the Steelhead. Our family of four eats about 3/4 of a pound of fish - so that is the size of fish that I currently buy for us. A typical portion of protein is anywhere between 4 - 6 oz per person, so do a little math and you can figure out how much you will need for your family.

This post is part of Real Food Wednesday and Simple Lives Thursday.

Grilled Steelhead

Ingredients

  • 1 Steelhead Filet (or other fish)
  • 1 Tablespoon Extra Virgin Olive Oil
  • 1 Lemon, sliced
  • 1 Handful of Fresh Herbs (I like Thyme and Oregano, but be creative)
  • 1 Leek or onion, sliced thin
  • Salt
  • Pepper
  • Aluminum Foil
  • Parchment Paper

Directions

  1. Preheat grill by turning all burners to High.
  2. Use one to two pieces of aluminum foil, depending on size and thickness of foil. It should be big enough to fully enclose the fish. If using Heavy Duty Foil then only one sheet is needed, but if using standard foil, use two sheets and double up on them.
  3. Line the aluminum foil with a piece of parchment paper.
  4. Place fish filet in the center of the parchment paper and coat with EVOO. Sprinkle with Salt and Pepper, onions or leeks, fresh herbs and gently squeeze a bit of lemon juice onto the fish. Place the lemon slices evenly over the herbs, onions, etc. on top of the fish.
  5. Close the parchment paper up, wrapping it around the fish. Wrap the aluminum foil around the parchment paper so that it is completely sealed.
  6. Turn the middle burner on your grill to low and leave the other two on high. Place the fish foil packet over the low heat and cook for 10-15 minutes. With a fork, check for doneness at 10 minutes. Fish should flake easily.
  7. That's it - super simple and DELICIOUS!
  8. Serve with a side of broccoli and a baked sweet potato for an extremely nutritious meal.
Prep Time: 10 min Cook Time: 15 min Ready in: 25 min
Click to add this recipe to your Recipe Book
Grilled Steelhead courtesy of Jamie Del Balso.

Wednesday, February 29, 2012

A Little Help From A Friend


When my first child was born we had moved across the country only months before our daughter was born. We had met only a handful of people, many of them kind enough to offer to bring us a meal, which we were so thankful for. One of these kind folks was a Korean friend who offered to bring spaghetti. I was surprised and had hoped for something more um, Korean. So, I asked. Apparently their family loves spaghetti, so she thought I would enjoy it too. Instead she brought Bulgogi, a Korean style lettuce wrap. It was DELICIOUS! Our friendship grew and she often made this meal (and others) for our family while we lived in Colorado. One day I asked for the recipe, so she gave me the long list of ingredients and told me to marinate the meat for about 12 hours! I was shocked and suddenly overwhelmed by her generosity. Since I had young children she would not let me repay the favor, although she often called us to help her understand some English phrase or words that she didn't know the meaning of. Ryan and I always enjoyed her calls, the questions she asked were always so random. Finally I convinced her and her family to come over for dinner on Christmas Eve for a homemade pasta meal - Ryan's family pasta, Cavatelli. That was most definitely a labor of love, but so worth it to say thank you to this very special friend and her family.

I'm tearing up (mostly with joy) just thinking about my friends in Colorado and the special couple of years we had in Family Housing. Just walking around Smiley Court at dinner time was like traveling to several countries at once. The food from others' kitchens always smelled better than whatever I was making that night for dinner. Alas, I digress...

Lettuce wraps sound kind of "summery," but actually many of the ingredients are in season right now! This recipe makes a lot, but my friend often marinated extra meat and froze it for future use. I have frozen the marinade ready to use at a later date. Feel free to cut it in half, thirds, even fourths, or make up some batches for the freezer. But you really may as well make all of the marinade as I am sure you and your family will love this meal! In fact, I served Venison Bulgogi to our Bible Study and no one knew that it wasn't beef. I told them after the meal, they all loved it. My friend always served this with a spicy bean paste, but when I stopped by a local Korean grocery store to pick some up, the owner did not know what I was requesting (nor did I really). So we sometimes add an Asian garlic hot sauce to add some kick to ours.

This post is part of Real Food Wednesdays over at Kelly the Kitchen Kop's site. Check it out for more great recipes. This post is also part of Simple Lives Thursday. Check out more great posts for living simply, HERE.

Bulgogi

Ingredients

  • 5 lbs Beef (or venison) cut pepper thin (you can use a cheaper cut here as the marinade makes it super tender)
  • 1 cup Soy Sauce (fermented), Tamari, etc
  • 1/2 cup Sugar (you could try less or use honey)
  • 1/4 cup Sesame Oil
  • 1/2 cup Chopped Green Onion (I've used regular onions)
  • 1/4 cup Sesame Seeds
  • 1/2 teaspoon Black Pepper
  • 3 Tablespoons Garlic, crushed
  • 1 Pear, seeded and roughly chopped
  • 1/2 Apple, seeded and roughly chopped
  • 6 oz Pineapple Juice (no sugar added)
  • 1 Head of Lettuce - Romaine, Bibb, anything large enough to use as a wrap
  • Cooked Rice, preferably brown or a mix of whole grain rice
  • Stirfry Veggies - broccoli, onion, carrots, water chestnuts, mushrooms, cabbage - whatever you like, cut small
  • Spicy Bean Paste, or other asian hot sauce

Directions

  1. Ask your butcher to cut the meat pepper thin, or do it yourself when the meat is slightly frozen (you can throw it in the freezer for about an hour or so, while you make the marinade and this should do the trick).
  2. In a blender, combine the Soy Sauce through Pineapple Juice and blend until thoroughly combined.
  3. In a non-reactive container, combine meat and marinade. If you plan on freezing some, go ahead and separate that now and place in the freezer. Marinate the meat for at least 12 hours.
  4. When you are ready to prepare the meal, heat a skillet over medium to medium high heat. Add the meat and whatever stirfry veggies you would like to use. Cook until the meat is cooked through and the veggies remain somewhat crisp. You may need to work in batches depending on how big of a skillet you have.
  5. Serve with lettuce, rice, and your choice of spicy sauce. Our friends always put less meat and rice in their lettuce than we did, thus eating a lot more lettuce than us.
Prep Time: 12 h Cook Time: 20 min Ready in: 12 h 20 min
Click to add this recipe to your Recipe Book
Bulgogi courtesy of Jamie Del Balso.

Wednesday, February 15, 2012

Honey Drizzled Lasagna

Pasticcio Bianco alla Rezdora
A few weeks ago my menu plan included some recipes from my new "Italian" Cookbook and this was one of them. I actually ended up pushing it off for more than a week due to illness in the family and finding time to make the mascarpone. You might find this odd, but I am not a huge fan of cookbooks. Rarely do I find a cookbook that I enjoy perusing. This book, however, was of the style that I enjoy - it has traditional recipes that you are not likely to find in too many other places and it is speckled with wonderful stories from the author who visited the various regions in Italy where the recipes have come from.

The Italian is translated as, Baked Pasta in the Manner of the Lady of the House. What a fun name! It kind of makes me think that I could invent or create my own pasta dish that becomes "my signature dish" to be served to guests when they visit. And although I briefly thought about making my own pasta (as called for in the recipe) I also picked up a box of "No Boil Lasagna Noodles" - I believe they were Barilla brand, the flat thin ones that most resemble homemade pasta. As I do not have a pasta maker, I opted for the store bought version this time, but when I have a bit more time on my hands I will likely try to make my own. We have made cavatelli by hand, it's Ryan's family's pasta from the region of Italy that his grandfather's family originated from and it is quite the undertaking. My mother-in-law called it a "labor of love," she has a cavatelli maker. Anyway, back to this recipe. When I served the lasagna I vaguely remembered reading something about serving it with a drizzle of honey. I thought it odd, but why not give it a try. Boy am I glad I did, it was a spectacular finish to this unique dish.

With all the different cheeses in this recipe, it can get a bit expensive. However, I found that making the mascarpone was not difficult at all. It did take a bit more time than I anticipated for my cream to reach the proper temperature, but other than that a bit of prep (say 45 minutes) can save you some money. Although the recipe calls for 2 cups of mascarpone and making it yourself will yield 12 oz, this was plenty. You could also make the ricotta, but it won't save you as much money as making the mascarpone.

This post is part of Real Food Wednesdays over at Kelly the Kitchen Kop's site. Check it out for more great Real Food recipes.

Creamy Honey Drizzled Walnut Lasagna

Ingredients

  • 1 pound Freshly Rolled Pasta (or 1 box flat no boil lasagna noodles)
  • 1 Tablespoon Sweet Butter
  • 1 1/3 cup Heavy Cream
  • 2 cups Mascarpone (or 2 cups heavy cream + 1 T lemon juice)
  • 2 cups Ricotta
  • 2 1/2 cups just-grated Parmigiano
  • 1 Tablespoon Sea Salt
  • 1 Freshly cracked pepper
  • 1 Generous scrapings of fresh nutmeg
  • 3 Eggs, beaten
  • 2 Tablespoons Balsamic Vinegar
  • 3 cups Walnuts, soaked and toasted/dried, finely chopped
  • 1/2 cup Bread Crumbs, made from stale bread
  • 1 Tablespoon Honey

Directions

  1. For fresh pasta, cook in salted boiling water for about a minute. Remove the pasta with a slotted spoon and place on a clean towel, do not place on top of each other (or they will stick together). For no boil pasta, if your cheese mixture is quite runny and you plan on letting it sit in the fridge for awhile, the bottom noodles could be used as is. However, I would recommend boiling some (or all if using immediately) of the noodles until pliable.
  2. Butter your baking dish(es). I used two 9x7x2.5 inch casserole dishes, making one for our family and one for a friend. Or you could use one large 10x13 baking dish. Pour about 1/3 cup of heavy cream onto the bottom of the baking dish.
  3. In a large mixing bowl, combine mascarpone, ricotta, 1 cup of heavy cream, 2 cups of Parmesan, salt, pepper, nutmeg, eggs and vinegar. Mix well and set aside.
  4. Place pasta rectangles on top of the thin layer of heavy cream to cover the pan, but do not overlap. On top of the pasta, spread a layer of the cheese mixture. Next add a layer of chopped walnuts. Cover the nuts with pasta and repeat with cheese mixture and walnuts. Continue this layering process until you have used up all the cheese and nuts. Finish with a layer of pasta.
  5. The lasagna can be covered with plastic wrap and left to rest in a cool place for an hour or two or in the refrigerator for longer.
  6. Preheat the oven to 350 degrees. Tear the bread into small pieces and process in a food processor until fine crumbs appear. Mix half a cup of crumbs with the remaining half a cup of grated Parmesan and sprinkle over the lasagna. Bake for 25 to 30 minutes until golden. Allow lasagna to rest for 5 to 10 minutes before serving. Drizzle individual pieces with a bit of honey.
Prep Time: 45 min Cook Time: 30 min Ready in: 1 h 15 min
Click to add this recipe to your Recipe Book
Creamy Honey Drizzled Walnut Lasagna courtesy of Jamie Del Balso.

Did you like this recipe? Find more authentic Italian recipes in this wonderful cookbook.

Wednesday, January 25, 2012

The Neverending Bean Pot


You may have noticed from our meal plans that we eat a lot of beans around here. Growing up the only beans I remember eating were baked beans - from a can. Always with meatloaf and kielbasa (or ring bologna). Our family eats a variety of beans (that's one of the things I love about beans - there are tons of different varieties of beans), but I think my favorite are probably black beans. Every week my crockpot doubles as a bean pot for soaking dry beans and then cooking them.

Beans/legumes - what's so amazing about them? They are chock full of nutrients and they have the most healthful mix of protein plus fiber among all other foods. They are great for your digestive tract, blood sugar regulation, heart, blood pressure and more. And when combined with wheat, corn, brown rice or nuts they make a complete protein. Not to mention they are super cheap! I can get a pound of beans for just a little over $1. Beans happen to be one of those things that I don't buy organic and I don't buy them in a can. There are about four cans of beans in one 1# bag of dried beans. The other reason I no longer buy canned beans is that cans are lined with BPA (Bisphenol A) remember that chemical that we worked so hard to get out of our plastic drinking bottles and baby bottles, the one that is linked to breast cancer and premature development in girls - yep, that's the one. It is in the lining of most canned goods. To my knowledge Eden is the only company that makes a BPA-free can lining.

So, not only are dry beans cheap and better for you than canned beans, but you can also control their flavor and increase the nutrient value by soaking them and cooking them in bone broth in your own home. With a little forethought you will have delicious and nutritious beans in no time. I've come across articles about pressure cooking beans and then canning them yourself in glass jars so that you have beans ready to use when you need/want them or you can make up a big pot and freeze them in smaller portions for future use.

Having traveled to South America a few times I have had the opportunity to eat incredibly flavorful beans and rice. When I was working as a HeadStart Preschool teacher many of my co-workers were Latino. I asked them why my beans and rice never tasted as good as what I had in South America. They told me the secret was "sofrito" that you could buy in the freezer section of some grocery stores and a seasoning packet that contained MSG. I tried that for awhile with mixed results. I have since found a recipe that doesn't use frozen sofrito from the store or seasoning packets containing things I can't pronounce. My recipe is one that I adapted from Cook's Illustrated to get the flavor and texture that I remember. The recipe calls for black beans, I have used pinto beans and pink beans, but my favorite is the black beans. Oh and they make really great refried beans too. Just throw some in the food processor until smooth and cook them up in an oiled pan (you can use bacon grease or lard if you prefer).

The Best Black Beans
Adapted from Cook's Illustrated

Ingredients

    Beans
  • 1 pound black beans, picked over and rinsed
  • 2 water to cover by, inches
  • 1 bone broth, stock or water to cover beans by an inch or so
  • 1 green pepper, stemmed, seeded and quartered (optional)
  • 1 medium onion, minced
  • 6 medium garlic cloves, minced or pressed (about 2 Tblsp)
  • 2 bay leaves
  • 1 teaspoon sea salt   

  • Sofrito
  • 3 Tablespoons light olive oil (or coconut oil)
  • 1 large onion, minced
  • 1 large green bell pepper, stemmed, seeded and minced
  • 2 tomatoes, chopped
  • 14 medium garlic cloves, minced or pressed (about 5 Tblsp)
  • 1 Tablespoon dried oregano
  • 3/4 teaspoon sea salt
  • 1 Tablespoon ground cumin
  • 5 teaspoons lime juice
  • 3/4 cup fresh cilantro leaves

Directions

  1. Soak beans overnight (12-24 hours) in very warm water (about 140 degrees). Drain the water before you are ready to cook your beans. If I'm making the beans for dinner I typically start cooking them after lunch in my crockpot with the bone broth, stock or water, quartered bell pepper, minced onion, garlic, bay leaves and salt. If using a Dutch oven on the stove top, bring the ingredients to a boil over medium-high heat and then reduce the heat to low and simmer, partially covered for about two hours. Add more water/broth if the liquid reduces to the level of the beans. Check the beans to confirm tenderness.
  2. To make the Sofrito, heat the oil in a large skillet (don't use a non-stick pan) over medium heat. Add the onion, bell pepper, oregano and salt - cooking until the vegetables are nearly soft (about 5 minutes). Add the chopped tomatoes and garlic allowing the juices from the tomatoes to cook off. Then add the cumin and cook for about another minute.
  3. To finish the beans, scoop out about 1 cup of beans and 2 cups cooking liquid adding to the pan with the sofrito. Use a potato masher (or fork) to mash the beans until smooth. Simmer over medium heat until liquid is reduced and thickened (about 10 minutes). Return the sofrito mixture to the pot of beans and simmer for 20 - 30 minutes. The beans will have a creamy sauce-like consistency. Add lime juice and simmer for another minute then stir in cilantro.
  4. Serving Suggestion = over brown rice with sauteed kale and a fried egg. ENJOY!
Prep Time: 24 h Cook Time: 4 h Ready in: 28 h
Click to add this recipe to your Recipe Book
The Best Black Beans courtesy of Jamie Del Balso.


Wednesday, July 13, 2011

Can't Live Without My Grill


I don't know about you, but in the summer I do most of my cooking on the grill - whenever possible.  I try not to turn on the oven unless it is a cool day or if I need to bake something.  I've been known to don a winter coat and boots to grill in the winter too.  Here is one of my many favorite recipes for the grill.  We use venison, because that is what we have, but the original recipe calls for beef (skirt steak).  Use whichever you prefer.  The recipe that I adapted comes from Cuisine at Home magazine and was a mole recipe, but Ryan isn't much of a fan of the mole - so I took out the cocoa.  Feel free to add it in if you like.  There is a fairly long list of ingredients and things to make, but that's kind of how it is with fajitas and tacos (at least at our house).  The roasted salsa is not necessary, but goes very well with the meat.  You could replace this with regular salsa if you want.  Also the bean dish is not necessary, but it is how we get our meat to go further.

The rub is fantastic, sometimes I make extra and keep it on hand for the next time I want to make fajitas. It would also make a nice "gift" with other spice mixes that you or your family like.  The black-eyed pea salad is a great accompaniment to most mexican meals, makes a nice side dish for summer meals and even tastes great as a salsa on chips.  The original recipe came from Cooking Light magazine.

Grilled Venison Fajitas with Roasted Salsa
Rub ingredients:
2 Tblsp brown sugar (I use sucanat)***
2 tsp each paprika and kosher salt (and cocoa powder if you want it)
1 tsp each ground cumin, garlic powder, and black pepper
1/2 tsp cinnamon

Roasted Salsa ingredients:
1 Tblsp olive oil
2 cups tomatoes, quartered or halved
1 cup red onion, chopped (white or yellow works fine too)
2 garlic cloves
1 spicy pepper of your choice (serrano, jalapeno, poblano all work well)
1 Tblsp fresh lime juice
sea salt to taste

Other Ingredients:
1 1/2 lb venison or skirt steak, trimmed
Vegetables for grilling (onions, peppers, beets, etc.)
Guacamole
Sour Cream
Cheese, grated
Whole wheat or corn tortillas, warmed
Black Beans and corn or Black-eyed peas salad (recipe follows)

Combine rub ingredients in a small bowl and stir to mix.  Rub/pat this mixture onto your meat and refrigerate until ready to grill.  Place the tomatoes, onion, garlic and spicy pepper (if using) in a medium sized bowl and drizzle with 1 Tblsp olive oil, toss to combine.  You can roast these on the grill if you like or in the oven at 500 degrees until starting to brown, about 25 minutes.  If you choose to roast on the grill, remember to rotate them often and only halve the veggies.  While roasted veggies are cooling, prepare (scrap clean) your grill for your meat.  Grill meat about 3 minutes per side (depending on thickness of meat).  Now return to your roasted veggies and throw them in a food processor or blender along with the canned chipotle chile in adobo (if using), the lime juice and salt.  Process until smooth.  Allow meat to rest for about 5 minutes.  Slice into thin strips across the grain.***Recently I've been making the rub without any sugar and I think I actually like it better!***

We like to eat these fajitas on whole wheat tortillas with guacamole (mashed avocado with some garlic, cilantro, lime juice, chopped tomatoes and salt), black beans and corn or black-eyed pea salad (see following recipe), sour cream, grilled peppers and onions, and a bit of grated cheese.

Black-eyed Pea Salad
1 cup fresh black-eyed peas (I use dried, soaked overnight)
1 cup water
1 cup chicken broth
1 cup frozen corn
1/2 cup diced red onion
1/3 cup chopped fresh cilantro
2 Tblsp cider vinegar
1 Tblsp olive oil
1/2 tsp sea salt
2 jalapeno peppers, seeded and minced (may want less depending on level of heat desired)
1 garlic clove, minced

If using dry peas soak overnight and drain water before cooking.  Combine peas, water and broth in a small pan and bring to a boil.  Reduce heat and simmer for about 30 minutes or until tender.  I like to use my crockpot on high to make beans - checking them throughout the day until they are tender, usually takes 2-3 hours (but is unattended for the most part).  Toss frozen corn into peas for the last minute or so to soften.  Mix together drained peas and corn with remaining ingredients.

For a printable version of the recipe, without pictures, click on the title of the recipe above.

Thursday, April 21, 2011

Where it all Began - Pasta Primavera


Last week I shared my first salad dressing committed to memory, but this week I'm sharing the recipe that got me interested in cooking, not just baking.  My uncle has a passion for food and cooking and showed me how to make this simple "Pasta Primavera" as he called it.  If I am remembering correctly my grandma and I were visiting him in Florida over my spring break my freshman year of college.  He had lots of fresh veggies and a jar of homemade canned stewed tomatoes.  Add some spices and seasonings and serve over some pasta - dinner was done!  It smelled fantastic and tasted incredible to me - so different from the "spaghetti" that I was used to eating.  This became a recipe that I made for friends often - nothing written down, just a process to remember and a variety of fresh or frozen veggies.

This is a great recipe in the height of summer when fresh vegetables are in abundance at farmers markets or in your own garden, but it is also a nice hearty meal that can be made year round with vegetables that store well (like carrots) alongside frozen vegetables.  Be creative with the vegetables that you use.  You can use green beans, summer squash and zuchini, cauliflower, asparagus, spinach or other greens, etc.  The key is to use vegetables that you and your family like and maybe try one new one.  I have not canned my own stewed tomatoes yet, but I hope to this summer.  We want to grow our own tomatoes, in addition to what we will get from our CSA, and hope to have enough to try our hand at canning.  I did can some marinara sauce once - wow that was a lot of work for the small batch of tomatoes that I had.  But now that I know the lining of canned goods contains BPA, I'd like to do a lot more of my own canning.  Ryan got me a huge pressure canner one year, but since then I haven't had a place to have a garden large enough to get much use out of the canner.

Pasta Primavera

Ingredients:
Olive oil to cover the bottom of the pan
1 medium onion, chopped
3 medium garlic cloves, crushed
*6-8 oz pork tenderloin (optional)
variety of fresh or frozen vegetables
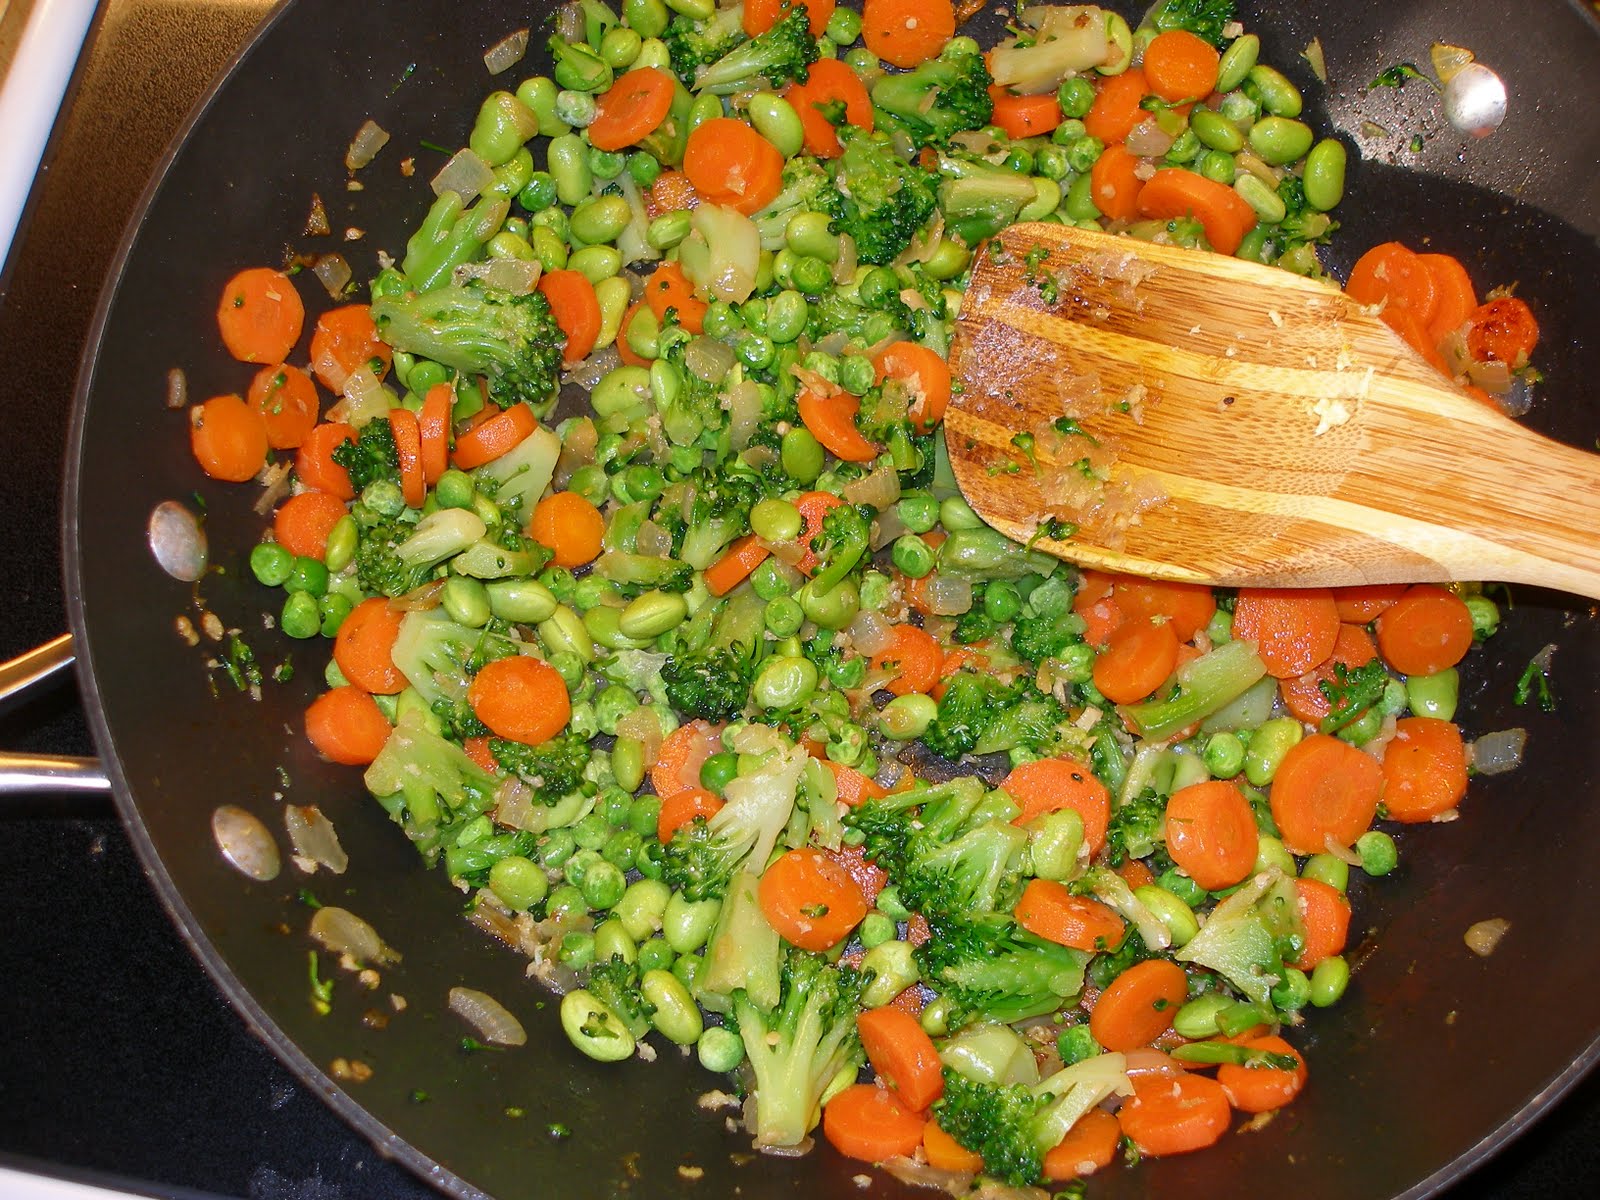
(I used broccoli, carrots, edamame, peas)
1 large can stewed tomatoes with juices
Italian Seasoning
Salt and Pepper to taste
Sucanat or sugar to taste
*Corn starch, optional
Spaghetti or similar pasta, cooked

Saute onions in olive oil over medium heat until beginning to soften; add crushed garlic and cook for about a minute to fully flavor oil.  If using the pork tenderloin, cut into small bite sized pieces and add to pan, keeping separate from onions/garlic.  Remove the pork when
browned on all sides, set aside for later.  Add carrots and other fresh vegetables to onions and garlic.  If using frozen vegetables, add those after fresh veggies have started to soften.  When vegetables are beginning to soften, yet still slightly firm/crisp, add stewed tomatoes and about a teaspoon of Italian seasoning - the one I used in the pictures was brought back from Italy by a friend and happens to contain some dried pepper flakes, which adds a nice little kick.  Feel free to add a bit of spice, but not too much that it over powers your meal.  Be sure to salt the sauce well, but not too much - just enough to enhance the flavor.  Add a tablespoon or two of sweetener to cut the acidity of the tomatoes.  If you like a thicker, less runny sauce, add a 

teaspoon or two to a bit of cold water, stir well and then add to sauce.  Bring sauce to a boil to thicken.  Return pork to sauce and simmer for a few minutes.  Serve over pasta and with some fresh bread and a side salad.

Thursday, March 17, 2011

"Irish" Potato Soup


Okay so this isn't really an Irish recipe, but since it is St. Patty's day and all I thought this soup would be appropriate.  For those of you that do not care for corned beef and cabbage, maybe you could make some Potato Soup and a cabbage salad for dinner with some Irish soda bread.  The nice thing about Irish soda bread is that it uses baking soda instead of yeast - so you can make it quickly and easily for dinner tonight!  I did find a site that specified if it has raisins, eggs, shortening, sugar or baking powder in it - that is not soda bread (that is cake).  Here is a nice Irish Soda Bread recipe that I think I've tried and enjoyed.

A few months ago I found myself with lots of potatoes from our CSA and had an urge to make potato soup without bacon, I'm not much for the stuff, but Ryan loves it.  So, I set out to find a healthier option for potato soup.  My cousin sent me her recipe which I did take a few ideas from, but the main recipe I chose came from EatingWell (a great magazine and website for finding healthier recipes).  And the results were fabulous - still smooth and creamy with lots of taste, but without the extra fat found in most recipes.  UPDATE: I'm not so afraid of full fat dairy anymore and HERE is why. It froze well too, I just had some left-overs yesterday for lunch.  The water had separated, but once it was heated up and stirred it was as good as the first time, if not better.  Freezing seems to add flavor to soups.

This happens to be under their Budget Friendly Recipes category and can easily be made vegetarian.  Anyway, on to the recipe...

"Irish" Potato Soup
Ingredients
1 tablespoon butter
1 tablespoon extra-virgin olive oil
1 medium onion, chopped
1 stalk celery, chopped
1 carrot, chopped
2 large cloves garlic (or 4 small), chopped
1 teaspoon chopped fresh thyme or parsley
5 cups chopped peeled potatoes
2 cups milk or cream or half and half (whatever you have)
4 cups reduced-sodium chicken broth or vegetable broth
1/2 teaspoon sea salt
Freshly ground pepper to taste
shredded cheese (optional)
chopped ham or crumbled bacon (optional)
sliced scallions (optional)
Preparation
Over medium heat melt butter and oil in a Dutch oven or soup pot. Cook onion, carrot and celery; stirring occasionally, until softened, about 4 to 6 minutes. Add garlic and thyme (or parsley); cook, stirring, until fragrant, about 10 seconds.

Stir in potatoes. Add  broth and milk; bring to simmer over high heat. Reduce heat to maintain simmer and cook until very tender, about 15 minutes.

Puree the soup in batches in a blender until smooth (do not use a food processor - it is not meant to handle large quantities of liquid). (Use caution when pureeing hot liquids.) Salt and pepper to taste, if you are using your own unsalted broth, you may need to add quite a bit more salt at this time.

Serve with shredded cheese, chopped ham or crumbled bacon and sliced scallions.

Notes:  This can easily be made vegetarian by using a vegetable broth or by making your own vegetable bouillon.  And to make this vegan, change the milk to water and the butter to more oil and only add scallions as a topping.

UPDATE: I made this yesterday and didn't have time to cook the onion, carrot and celery first. I threw everything (minus butter, olive oil and milk) into the crockpot and turned it on high for two+ hours. When I got home from my appointment I added cream and blended it. Then I browned some butter and added that to the finished soup - DELICIOUS!

Oh and my favorite cabbage salad is so simple - thinly sliced cabbage topped with sliced avocado and drizzled with extra virgin olive oil and balsamic vinegar, salt and pepper to taste.  Delicious and so simple!

Friday, March 4, 2011

A trip to Northern Africa

I think it was June last year when we received an unexpected package in the mail containing a beautiful North African cookbook! I was seriously so excited about it I wanted to make something from it that very night. It came from a friend who currently lives in North Africa and shares my love for cooking. Just reading through the book made me want to hop on a plane and visit a few friends of ours that are in that area. Over the next week or two I made a couple of the recipes and absolutely loved them. I found a lamb and prune tagine recipe in the book, but had chicken and not lamb on hand so I looked in another Mediterranean cookbook of mine and happen to find a chicken and prune tajine recipe, so I took a bit from each book and made a wonderful dish that I shared with Ryan's cousin who had recently had her first child. She loved it and had asked for the recipe, but I am just now getting around to writing down what I had done to the recipe to make it taste even better.

I actually made the recipe two nights in a row because I wasn't quite comfortable serving a dish to someone that I had not yet made for my family. Although I have done this in the past, this one was a bit unique, so I wanted to check it out first, besides I really wanted to try it myself. In making it the first night I realized that the cooking time for the chicken needed to be adjusted - it got a bit too dry and although the meal was incredibly flavorful, the chicken hadn't taken on as much of the flavor as I had hoped. So, I tried brining the chicken and that helped a ton. But I also was low on saffron and prunes after making it the first time so I added some turmeric and dates - very tasty!

Although I do not own a tagine/tajine - a domed clay pot, I was able to make this aromatic dish in a large saucepan on my stovetop. You'll want to start the brine in the morning if you plan to have this for dinner. Or sometimes I brine my chicken when I get it and then wrap it in smaller portions and freeze it. The recipe primarily comes from my Reader's Digest Mediterranean Cooking cookbook with a few ideas from my Medina Kitchen cookbook (the unexpected gift in the mail).


Chicken Tajine with Prunes
Tajine de poulet aux pruneaux
Brine:
1/2 cup sea salt
1/4 molasses
1 cup boiling water + more cold water and ice
1 whole cut-up chicken (bone-in)

Mix 1/2 cup of sea salt and 1/4 cup of molasses into 1 cup of boiling water until salt is completely dissolved. Add ice and 1 more cup of cold water, when brine is cool to the touch add chicken and fill with water until chicken is fully covered. Store in refrigerator for a 4-5 hours.

Ingredients:
Brined chicken (from above)
1-3 large onions, chopped
1-2 cloves of garlic, minced
1-2 Tablespoons olive oil
2 Tablespoons of butter
1 cinnamon stick
1/4 teaspoon saffron threads or 1/2 teaspoon turmeric*
1/2 teaspoon ground ginger*
freshly ground pepper
1 1/2 cups water
1 cup pitted prunes
1/4 cup whole dates, chopped
2 Tablespoons honey
2 Tablespoons fresh lemon juice
1 Tablespoon sesame seeds
3/4 cup sliced almonds, toasted

Lightly cover the bottom of a large saucepan with olive oil and add butter, onions, garlic, and spices. Add chicken and cover with 1 1/2 cups water. Cover the pan and cook over low heat for 20-30 minutes, turning chicken halfway through. At 20 minutes you may want to remove smaller pieces of chicken to a plate, but continue cooking thicker breast pieces. After 30 minutes check chicken to make sure juices run clear and it is no longer pink. Remove chicken to plate and cover. Add the prunes and dates to the cooking liquid, cooking until softened - about 10-15 minutes. Add honey and lemon juice, reducing liquid by half. You can turn up the heat to medium to speed up the process or continue to cook on low. Return the chicken to the sauce and cook for an additional 10 minutes.

Couscous:
1 cup water
3/4 cup whole wheat couscous
1 Tablespoon ground flax seed*

For couscous, boil 1 cup of water and add 3/4 cup of whole wheat couscous and 1 Tablespoon ground flax seed. Remove from heat, cover and let sit for 5-10 minutes. Fluff with a fork before serving.

Serve over whole wheat couscous and sprinkle with sesame seeds and toasted almonds.

Side notes: If you choose not to brine your chicken, you will want to add salt at some point to the recipe. If, however, you do brine the chicken you should not need to add any additional salt. Both saffron and turmeric happen to be in my spice cupboard due to my love for cooking international dishes. Saffron is the more pricey of the two and the one called for in the original recipe. Turmeric can be used in it's place and will likely be cheaper. I have a huge package of turmeric that I found at an Indian grocery store and I keep it in my freezer. This
recipe calls for dry ground ginger, but if you have fresh, I bet it would be delicious! Grate about a teaspoon into the pan along with the onion and garlic and spices. The flax seed is totally optional, but I once bought a box of whole wheat couscous that contained flax, so I thought why not add it - you can never have too much fiber (well maybe some people can).


As always, enjoy!  And please forgive the look of the last few posts as they have added a an updated edit option, but it is not working as well as I had hoped:(

Friday, February 25, 2011

Favorite Comfort Food


With the chicken that I had left from making my own chicken stock I made one of our favorite comfort foods - chicken pot pie! Not the healthiest meal out there, but with only one crust it takes away a ton of the extra fat. Definitely not the healthiest meal of the week since we had coconut cream pie for dessert too. Ryan's birthday was Valentine's Day and he was out of town on business, so I finally got around to making his second favorite dessert (the other being - chocolate mousse pie, has been relegated to once a year and we had it for Christmas Eve).

In addition to the pot pie I made a hot chicken appetizer dip which we ate along with some other snacks for a snacky style lunch and made chicken quesadillas for lunch twice. So, out of that one chicken I got 10 pint size canning jars of stock plus 5 two cup Ziploc containers; one dinner; and about five lunches (counting the left-overs from the pot pie) for a family of four (with small eaters). Not to mention all the meals the stock will aid in making. Pretty good deal, huh?

Although I have tried different whole wheat crust recipes, I can't seem to find the one that I thought was rather decent. If you happen to have one that you like, please pass it along so that I can give it a try. I did find this one that looks interesting and would be worth a try. One of the reasons I love this recipe is that it is so easy and so quick to make. I have tried other pot pie recipes that were also very good, but a bit more time consuming, so I keep coming back to this one. The original recipe came from the box of the Pilsbury pie crust, but they no longer have the recipe on the box. Yes, I do sometimes use store bought pie crust. I guess it is one of those things that I don't particularly enjoy making. I just wish Pilsbury would start selling a whole wheat version - so that we could get a bit of health out of the pie crust too. Anyway, on to the recipe. UPDATE - I have finally found a whole wheat pie crust recipe that we actually like. See bottom of page for recipe.

Homemade Chicken Pot Pie
Ingredients:
1 pie crust (store bought or homemade - whichever you prefer)
1/3 cup butter
1 medium onion, chopped
1 large potato, chopped
1/3 cup white wheat flour (or all-purpose)
1 to 1 1/2 cups homemade chicken stock (or broth)
2/3 cup milk
2 1/2 to 3 cups shredded cooked chicken or turkey
2 cups (16 oz bag) frozen mixed vegetables
salt and pepper to taste

Directions:
Preheat oven to 425 degrees.


Melt butter in large pan over medium heat. Add onion and potatoes and cook until tender.


Add flour to make a roux, cooking for a couple of minutes. Gradually stir in milk and then broth. If you use all-purpose flour, you will likely need more liquid and if you use white wheat you will need less. Stir until bubbly and thickened. Add salt and pepper at this time - if you salted your stock you will need less, whereas if you did not salt your broth you will need more. Sometimes I add a teaspoon of chicken boullion to give it some added flavor. I like lots of freshly ground pepper, but season to taste.


Add shredded chicken or meat and thawed veggie mix. Pour chicken mixture into 9 inch or 9.5 inch pie plate. 


Cover with pie crust and use your fingers to create a decorative edge. Cut a few slits in the top to vent and voila - you are ready to bake! Bake for 30-40 minutes, until crust is golden brown. Let stand at least five minutes before serving. You may want to put the pot pie on a cookie sheet or put the sheet on the rack below - mine has a tendency to overflow (even in the 9.5 inch pie plate)!

Side notes:  I have added mushrooms (to the step with the onions and potatoes), so if you like mushrooms - go ahead and add them to your potpie.  Thyme is probably my favorite herb, so it has been known to make it's way into my potpie from thyme to time:)  Feel free to add your favorite spice(s) to your pot pie.  Make it your own!

For a printable version of this recipe (without pictures) click here.

Did you try making the chicken stock yet? If you did, what did you do with the chicken meat?

UPDATE - Whole Wheat Pie Crust
1 3/4 cup Whole Wheat Pastry Flour (or spelt flour or a combination of both)
1/2 tsp salt
1/2 cup Palm Shortening or Butter (my preference is the palm shortening)
1/2 cup (or less) cold water


I use my food processor to cut the flour, salt, and shortening, but you could use a pastry blender or fork.  Again, I add the cold water slowly to my food processor until it forms a ball. If doing by hand, add water slowly until it forms a cohesive mass. With floured hands, make into a round ball and flatten on a floured pastry cloth or board. Roll out until desired thickness and large enough to cover your pot pie. Trim the edges and flute/pinch to form a decorative border. With the extra pie dough, you can always do something fun for dessert, like small fruit tarts like this. I used a muffin tin to form the tarts and baked at 350 degrees for 20-25 minutes.

Thursday, February 3, 2011

Variety is the Spice of Life


I know many of you might be turning up your nose to tofu, but then again many of you may have tried it and liked it or not entirely enjoyed it or you could be one of the few that actually eats it quite regularly. We kind of go in spurts in our household as there are a handful of recipes that I have found that we enjoy. My son actually loves it (he is only 21 months)! I was trying to incorporate it into our meal plan on a weekly or bi-weekly basis, but lately it has been much less. Partly because my freezer is well stocked with venison and that has now become a meal priority! We do, however, have at least one meat-free meal each week.

There are many benefits to tofu - it is usually cheap, stores for quite a while and is extremely versatile (in addition to all the other things you've probably heard/read about soy). Recently, however, I have discovered that there are some issues with unfermented soy products as well as Genetically Modified soy (or anything GM for that matter). I guess my motto is - Variety is the Spice of Life! So now we have it about once a month and I try to combine fermented soy with unfermented soy (much of the tofu we find in stores). Okay, now that I've totally scared you, if you don't want to try the tofu in this recipe, it can be replaced with just about any other meat product - chicken, shrimp, beef or pork would be great substitutes. Just don't marinade them as long as I do the tofu!

Some people avoid tofu because of the texture. That is what I love about this recipe, the wheat berries in here add that chewiness that we (omnivores) typically enjoy when eating meat. Some avoid it because of the lack of flavor - which is unfortunate because it can have so much flavor, if prepared well. So, what the hey, give it a try and see what you think! Be sure to look for a non-GM tofu option. Oh and give yourself some time for this one - it takes a bit of advanced prep, you need to start the night before you plan on making this. But in my opinion it is worth it.

The idea for this recipe came from Tosca Reno's book "The Eat-Clean Diet for Family & Kids." After reading her tofu and wheat berry salad recipe I thought hmm, that looks and sounds similar to fried rice - why not add a few more things and make it a meal instead of a salad. So that is what I did and now it has become a family favorite.

Tofu Fried Rice

Marinade:
6 Tbsp light soy sauce or low-sodium tamari
2 tsp fresh ginger root , peeled and minced*
3 cloves garlic, pressed
2 Tbsp oil*
Pinch red pepper flakes
1 tsp agave nectar*
1/4 tsp toasted sesame oil

Other Ingredients:
1 - 12-16 oz pkg firm (or extra firm) tofu
3-4 cups water or low-sodium stock/broth
1/2 cup brown rice (or rice mix/blend)*
1/2 cup wheat berries*
1/4 cup thinly sliced scallions/chives (optional)
1 medium onion, peeled and chopped
1 medium carrot, peeled and chopped
1 medium zucchini, chopped
1/2 cup frozen peas, thawed
2 eggs (or half cup egg whites/egg substitute)
Sea salt and fresh ground black pepper
Sesame seeds (optional)

Preparation:
Place wheat berries in a glass bowl. Cover with about 4 cups water. Put a plate over the bowl and let stand overnight (on counter). Remove tofu from package and drain water. Place on plate lined with several layers of paper towel (or use a skoy cloth or similar absorptive re-usable cloth). Cover tofu with more paper towels or another absorptive re-usable cloth. Top with a plate and heavy items to weight down (and drain) tofu overnight in refrigerator.

In the morning, make marinade by mixing ingredients above. Cut tofu in half so that you have two large thin slabs and place (or other meat) in flat glass dish. Cover with marinade and flip slabs half-way through the day - keep refrigerated. If you plan to use meat, only marinade for about an hour and reserve some of the marinade (about 2 Tblsp) for later use.

Prepare rice and wheat berries. The recipe calls for doing these separately and in the oven, but I do them on the stove and I believe the last time I did them together. If you have a rice cooker you could also use that. The wheat berries will need to be drained before cooking. If you have package directions for your rice - follow that, otherwise I typically double the amount of water/stock per rice (so for here it would be half cup rice to one cup water/stock). For the wheat berries use about 1 1/2 cups water/stock to the 1/2 cup wheat berries. Or if you combine them, use 2 1/2 cups water/stock for both. This will likely take about 45 minutes for the rice and wheat berries to become tender.

Meanwhile, remove tofu from marinade and cut into small bite-sized cubes, reserve marinade (do not do this if using meat/seafood). Sauté onion in a touch of oil in a large non-stick pan over medium heat. Add tofu and cook until starting to brown. Add carrots, zucchini and peas. When carrots are
starting to soften make a "hole" in the center of the pan by pushing the tofu and veggies to the sides. Place your eggs or egg whites or egg substitute in the center of the pan and fry/scramble. When eggs are cooked add rice and wheat berries. Season with salt and pepper and 2 Tbsp of reserved marinade. Plate fried rice and sprinkle with sliced chives/scallions and sesame seeds if you desire.

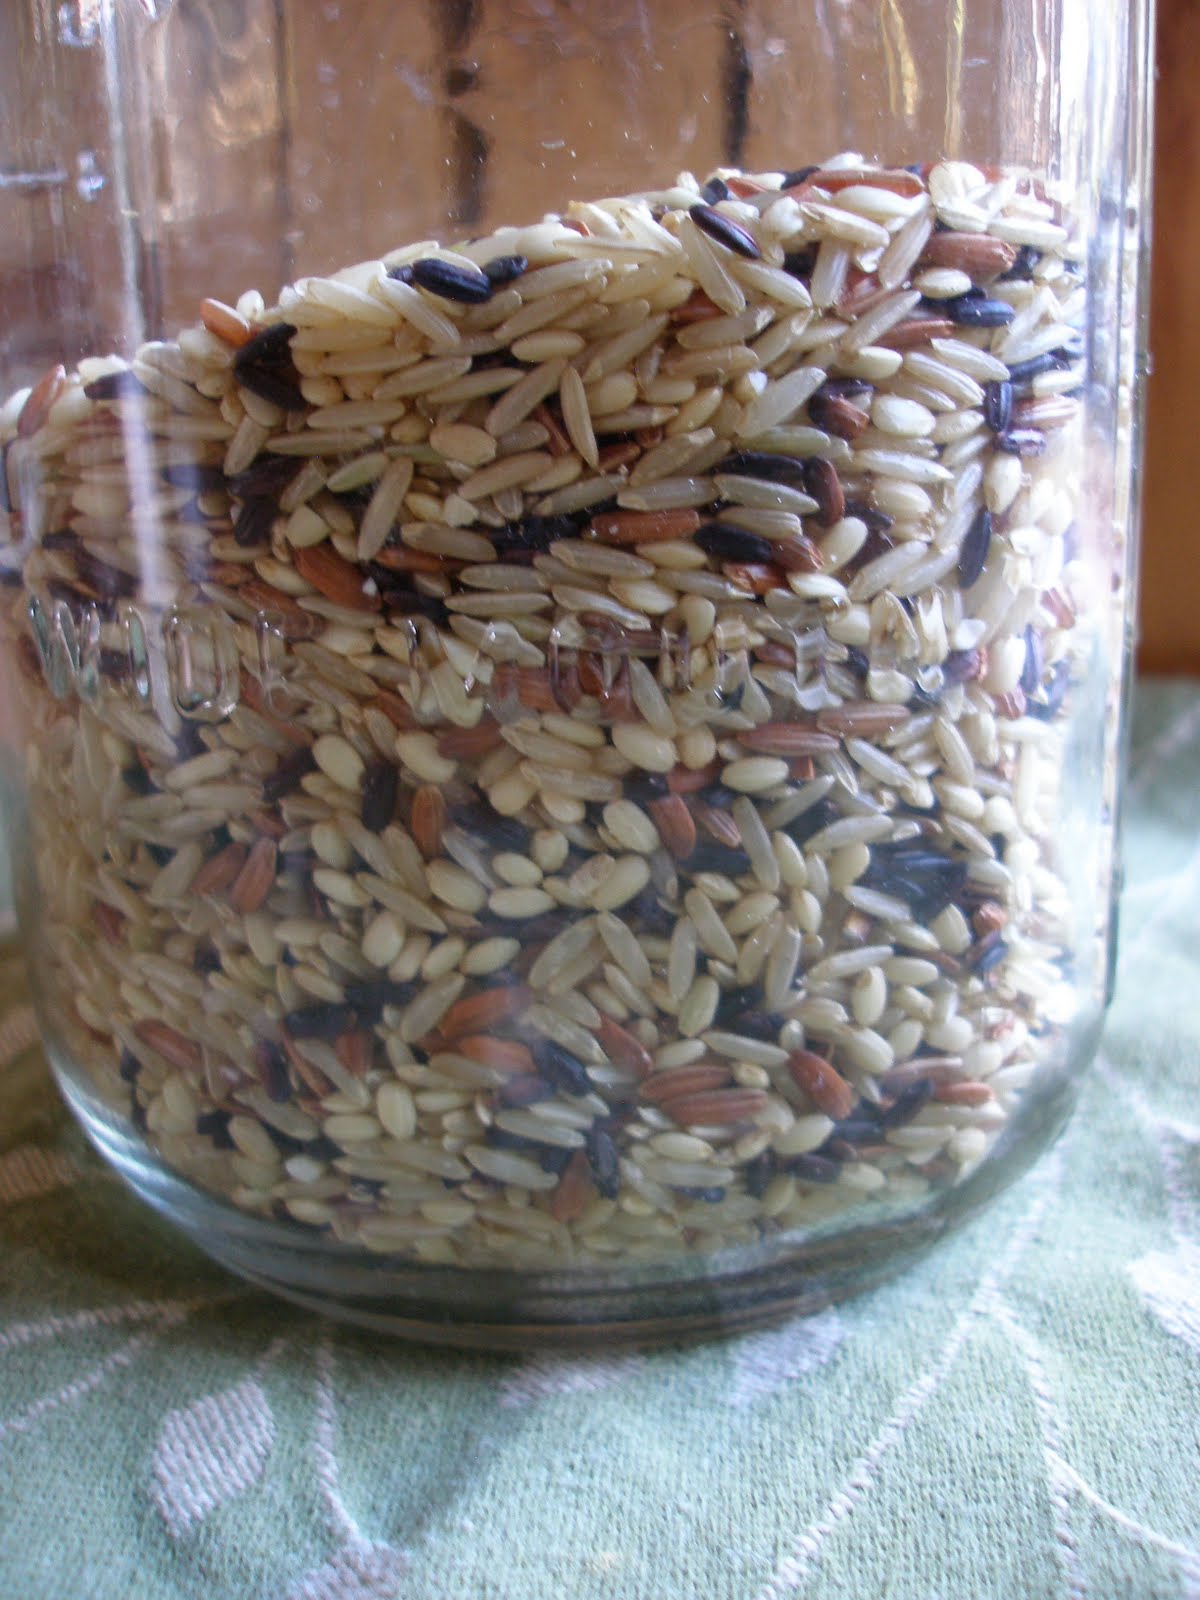
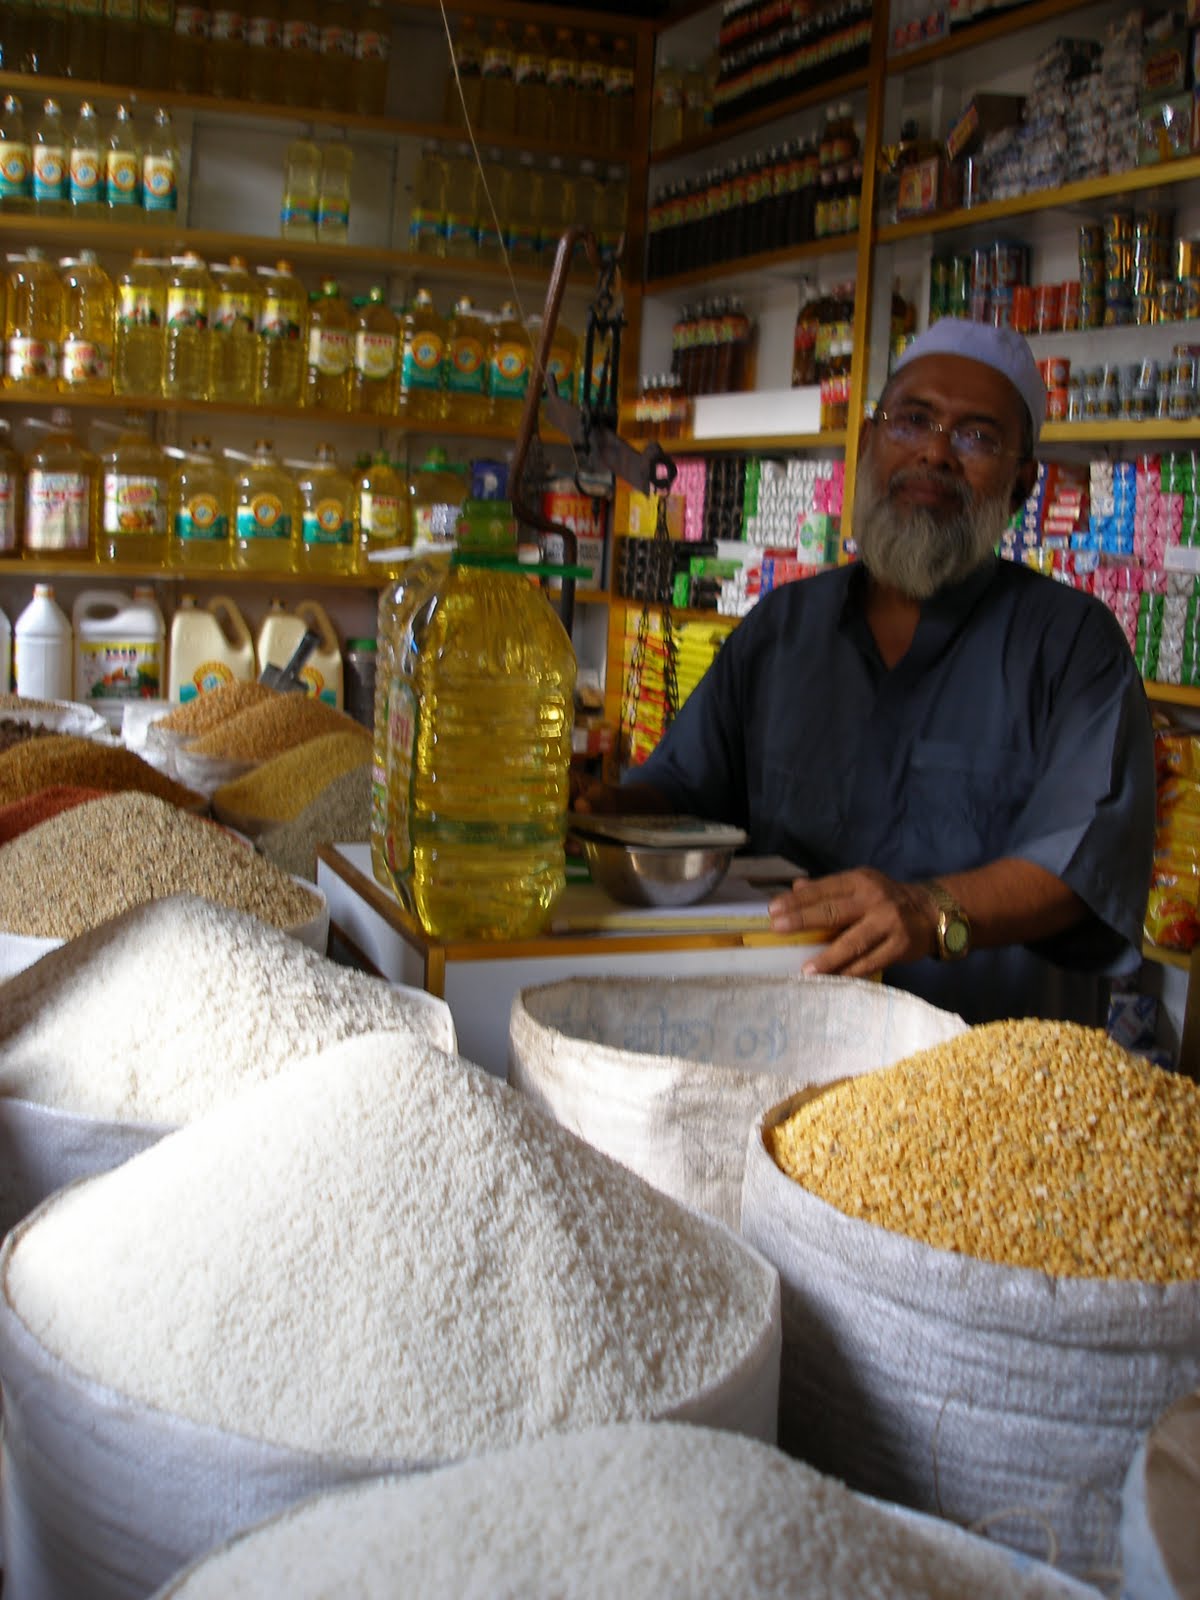
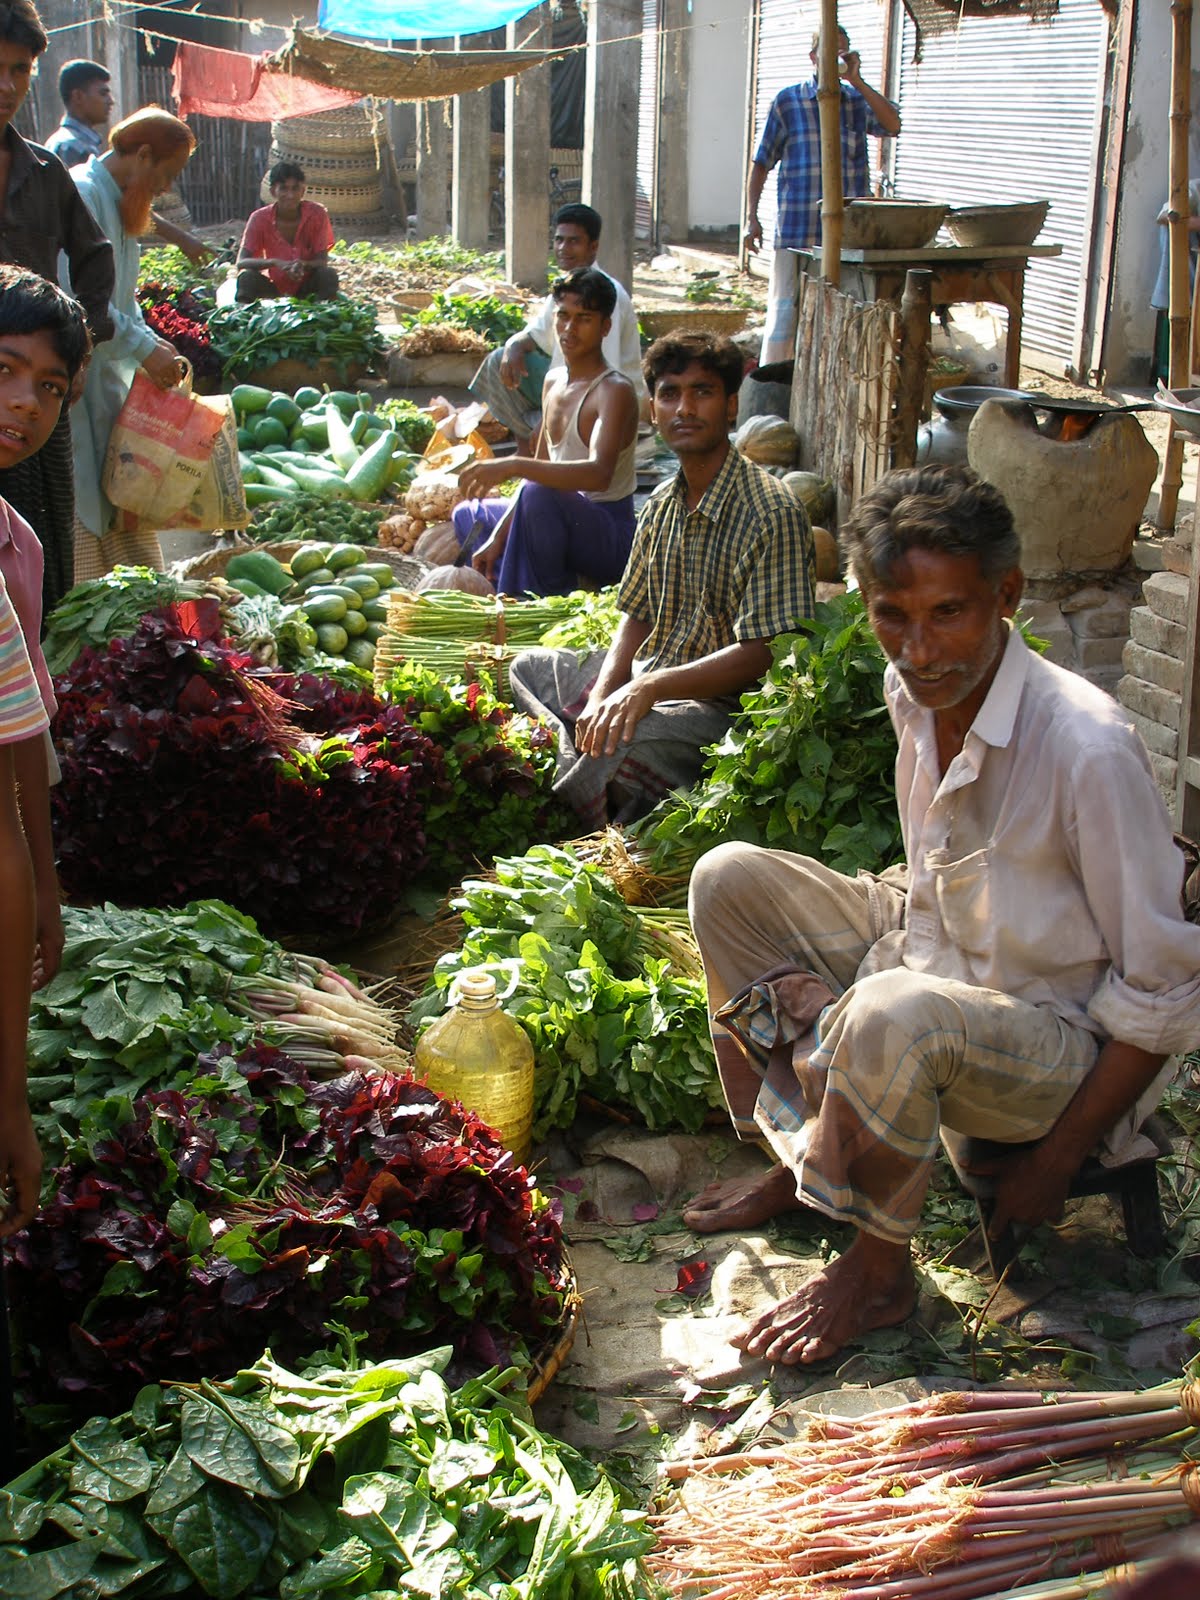
*My notes: For mincing the ginger, I like to use a microplane grater that I hold over the bowl or measuring cup that I want the ginger in. I rarely measure the ginger (I guesstimate), but if you want to, then I suggest doing it over a separate bowl before adding it to the marinade. The recipe calls for olive oil, but since it is eventually going to be cooked I prefer to use a different oil. I've been trying out new oils - recently sunflower and safflower have been in my cupboards. I suggest you find a "cooking" oil that you like. Why don't I use olive oil for cooking? It's kind of a waste - all the benefits of olive oil are completely lost when you heat it up. What is agave nectar? It is a sugar alternative that is fairly new to the market and of course not without it's own controversies. In essence - sugar is sugar, no matter what form it comes in and sugar is not good for you - period! However, most people want to enjoy life, so we eat a bit (or a lot) of sugar. You could try honey or maple syrup in it's place if you do not want to try agave nectar or don't have it on hand. Agave nectar is more concentrated than these other sweeteners, so you may want to double it, but that is not necessary - I don't even remember using it, but I probably did. Not sure if you like brown rice, we didn't use to. Then I started trying other varieties and mixing them together - then one day it was like, wow this is brown rice? Of course it still doesn't taste like white rice, but it has more flavor than the original stuff that I was getting. So, there are a few options for making brown rice better. What I like to do is go to the co-op and pick from their bulk bins a variety of brown (or colored) rice. My mix usually contains a short sweet brown rice, a longer brown rice, a little bit of wild rice, some red rice and sometimes black japanica rice. You could also add a bit of quinoa, barley, and/or millet. Another option is if you have a Costco membership I hear they have a good mix for a good price. And yet another option is check your local grocery store - they often sell containers of mixed rice. In fact, Mambo Sprouts currently has a coupon for RiceTec, which I've seen at Roundys and Kroger stores. Don't know where to find wheat berries? Unfortunately I don't have a ton of ideas for this. I would check any store that has a bulk section. I have found them at my co-op and other health food stores. Or, if you happen to live in Bangladesh - you should be able to find them in your local market quite easily! :) Hope you enjoy these additional pics from Bangladesh markets (a trip we made before kids, although I'd love to travel with them someday).

This is getting posted earlier than I originally anticipated to make room for some Valentine's Day items next week. I'll be sharing my Red Velvet Surprise cupcake recipe as well as my favorite whole grain cut-out cookie recipe.