Showing posts with label vegetarian. Show all posts

Wednesday, April 4, 2012

Left-over Rice - For Breakfast


Lately I have found myself throwing away left-over rice that has sat in the refrigerator for far too long. :( Once we are finished eating the left-over food that went with the rice I never know what to do with it. Then, it came to me the other day - BREAKFAST. I was cooking eggs for a typical fried eggs and toast meal, but I wasn't really in the mood for toast. Suddenly I had an urge to have my yolk a little runny (which is not normal for me at all - I like my fried eggs over HARD). Thinking of the left-over rice in the fridge, and an article that I had read about breakfast in other cultures not being so "set" as our American breakfast, but usually more like last night's dinner re-heated; I decided to try a scaled down version of Bibimbap for breakfast. Basically seasoned rice (soy sauce and hot sauce) with a runny egg over the top - and I LOVED IT!

I enjoyed my runny egg over rice breakfast so much, I decided to do it again, but this time I added sauteed carrots and spinach to it. Even better! Really this could be a meal for any time of day - Breakfast, Lunch or Dinner. Now I am looking forward to having left-over rice in my fridge and using it to add variety to my breakfast repertoire. In the recipe below I added some veggie ideas for the Breakfast Bibimbap, but I say whatever you have on hand would go great with your runny egg and seasoned rice. Oh and measurements for seasonings below are approximate, I didn't really measure, I drizzled the Tamari and Toasted Sesame Oil over the rice. Be Creative!


This post is part of Real Food Wednesday, Simple Lives Thursday, It's a Keeper Thursday, These Chicks Cooked, Creative Juice, and Gluten-Free Wednesday.

Breakfast Bibimbap

Ingredients

  • 1 cup Left-over Rice
  • 1 teaspoon Tamari (Soy Sauce or Shoyu)
  • 1 teaspoon Toasted Sesame Oil
  • Hot Sauce to taste
  • 2 Tablespoons Butter
  • 1/2 Carrot, sliced in rectangles
  • 1 Handful of Spinach
  • 1 Handful of Mushrooms, sliced or chopped
  • 1 Handful of Bean Sprouts
  • 1 - 2 Eggs
  • Salt and Pepper to taste

Directions

  1. Re-heat left-over rice and add Tamari/Soy Sauce, Toasted Sesame Oil and Hot Sauce.
  2. Melt 1 Tablespoon of butter in a pan over medium heat, add sliced carrots, mushrooms and bean sprouts (or veggies of choice). Season with salt and pepper.
  3. Pour boiling water over spinach until wilted, and press out excess water.
  4. Place cooked/wilted veggies over seasoned rice.
  5. Add remaining Tablespoon of butter in hot pan and add egg(s), salt and pepper as desired. Cook egg sunny side up or over easy, so that yolk is still "runny" - which adds great flavor to this dish. Place egg on top of veggies and rice.
  6. Dig in!
Prep Time: 5 min Cook Time: 10 min Ready in: 15 min
Click to add this recipe to your Recipe Book
Breakfast Bibimbap courtesy of Jamie Del Balso.

Wednesday, March 28, 2012

Crockpot Indian


Chicken Tikka Masala and Mattar Paneer are my two favorite dishes to order at an Indian restaurant, although I am not sure how authentic the first is. When we were in India I was never able to find it on a menu and Americans living in Bangladesh and India had not heard of it. Anyway, this recipe is kind of a combination of both of my favorite dishes. I have made a more traditional Chicken Tikka Masala, but it is a bit of work with the marinade and skewers and grilling, so I much prefer this easier crockpot version. You can also do it with bone-in chicken pieces (layering the sauce, chicken, and cauliflower in your crockpot), but the paneer is just so much easier.

If you do not have access to an Indian grocery store and cannot find paneer in your area, you could always make your own using milk and lemon juice. I have not yet done this, but maybe I will someday, just to see what it is like. If you do have access to an Indian grocery store, pick up a can of pureed mango while you are there and use it to make Mango Lassi to go with your meal (plain yogurt, mango puree, water to thin, and sugar or honey to taste - blend until smooth). Oh and freeze the left-over mango puree for more Mango Lassi or Mango Margaritas:)

Due to my children eating this meal, we do not make it very spicy. If you want more spice, feel free to add a chopped jalapeno with the garlic and ginger.

It is definitely worth the time to make some Whole Wheat Chapatis (Roti) to go with the meal, and I recommend letting the flour mixture sit for 2 hours or more (when I remember to start early enough, I do this). And I've tried the dry skillet method, but it doesn't work well for me, so I use an oil sprayer to coat the pan before each Chapatis goes in. Here is another recipe from one of my favorite Food Network Hosts, for Indian Griddle Breads (aka Chapatis).

Paneer Mattar Masala

Ingredients

  • 1 Package of Paneer
  • 3 Tablespoons of Olive Oil
  • 1 Large Onion, chopped
  • 3 Cloves Garlic, pressed
  • 1 Tablespoon Chopped Fresh Ginger
  • 1 1/2 Teaspoons Ground Coriander
  • 1 Teaspoon Turmeric
  • 2 Teaspoons Ground Cumin
  • 2 Teaspoons Paprika
  • 1/2 Teaspoon Red Pepper Flakes
  • 1/2 Teaspoon Cinnamon
  • 28 oz Can Crushed Tomatoes
  • 1/2 Juice of, Lemon
  • 1/2 Head of Cauliflower, broken into small florets
  • 1 Cup Frozen Peas (thawed or frozen)
  • 1 Salt to Taste
  • 1/2 Cup Heavy Whipping Cream

Directions

  1. Cut the paneer into bite sized pieces and set aside. (I typically only use half of a block and freeze the other half for another time or another recipe.)
  2. In a skillet, heat 3 Tablespoons of olive oil over medium heat and add the chopped onion.
  3. While onion is softening, mix together the dry spices in a small bowl.
  4. Add the paneer to the onions and brown slightly then add the garlic and ginger. Once this is fragrant add the dry spices and mix thoroughly to coat.
  5. Stir in the crushed tomatoes and lemon juice. (The original recipe calls for using an immersion blender or blending about half of the sauce, but I just keep it thick - do what you like. If you do want to blend it, then don't brown the paneer with the onions; add it after the sauce is blended.)
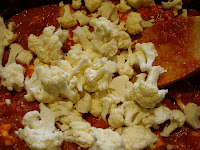
  6. In your crockpot combine the sauce, (paneer if blending sauce), and cauliflower.
  7. Because the original recipe called for chicken, the instructions were to cook on high for one hour and then low for 4 - 4 1/2 hours, but with paneer that is not necessary. If you want to cook this all day, while you are at work - then I would put it on low and cook for the entire day. If you have much less time or want to start it in the middle of the day (say during nap time) then cook on high for an hour or so and turn to low until cauliflower is at desired tenderness.
  8. Add the peas during the last half hour of cooking.
  9. Before serving, stir in the Heavy Cream, use as much as desired. If you don't have cream, half and half or whole milk will also work, but my preference is the creaminess of the heavy cream.
  10. Serve over rice and with Whole Wheat Roti/Chapatis.
Prep Time: 30 min Cook Time: 5 h 30 min Ready in: 6 h
Click to add this recipe to your Recipe Book
Paneer Mattar Masala courtesy of Jamie Del Balso.

This post is part of Real Food Wednesdays and Simple Lives Thursday.

Wednesday, February 15, 2012

Honey Drizzled Lasagna

Pasticcio Bianco alla Rezdora
A few weeks ago my menu plan included some recipes from my new "Italian" Cookbook and this was one of them. I actually ended up pushing it off for more than a week due to illness in the family and finding time to make the mascarpone. You might find this odd, but I am not a huge fan of cookbooks. Rarely do I find a cookbook that I enjoy perusing. This book, however, was of the style that I enjoy - it has traditional recipes that you are not likely to find in too many other places and it is speckled with wonderful stories from the author who visited the various regions in Italy where the recipes have come from.

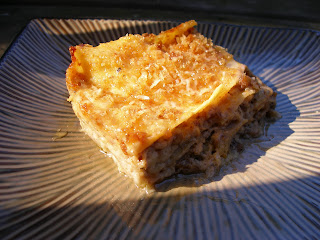
The Italian is translated as, Baked Pasta in the Manner of the Lady of the House. What a fun name! It kind of makes me think that I could invent or create my own pasta dish that becomes "my signature dish" to be served to guests when they visit. And although I briefly thought about making my own pasta (as called for in the recipe) I also picked up a box of "No Boil Lasagna Noodles" - I believe they were Barilla brand, the flat thin ones that most resemble homemade pasta. As I do not have a pasta maker, I opted for the store bought version this time, but when I have a bit more time on my hands I will likely try to make my own. We have made cavatelli by hand, it's Ryan's family's pasta from the region of Italy that his grandfather's family originated from and it is quite the undertaking. My mother-in-law called it a "labor of love," she has a cavatelli maker. Anyway, back to this recipe. When I served the lasagna I vaguely remembered reading something about serving it with a drizzle of honey. I thought it odd, but why not give it a try. Boy am I glad I did, it was a spectacular finish to this unique dish.

With all the different cheeses in this recipe, it can get a bit expensive. However, I found that making the mascarpone was not difficult at all. It did take a bit more time than I anticipated for my cream to reach the proper temperature, but other than that a bit of prep (say 45 minutes) can save you some money. Although the recipe calls for 2 cups of mascarpone and making it yourself will yield 12 oz, this was plenty. You could also make the ricotta, but it won't save you as much money as making the mascarpone.

This post is part of Real Food Wednesdays over at Kelly the Kitchen Kop's site. Check it out for more great Real Food recipes.

Creamy Honey Drizzled Walnut Lasagna

Ingredients

  • 1 pound Freshly Rolled Pasta (or 1 box flat no boil lasagna noodles)
  • 1 Tablespoon Sweet Butter
  • 1 1/3 cup Heavy Cream
  • 2 cups Mascarpone (or 2 cups heavy cream + 1 T lemon juice)
  • 2 cups Ricotta
  • 2 1/2 cups just-grated Parmigiano
  • 1 Tablespoon Sea Salt
  • 1 Freshly cracked pepper
  • 1 Generous scrapings of fresh nutmeg
  • 3 Eggs, beaten
  • 2 Tablespoons Balsamic Vinegar
  • 3 cups Walnuts, soaked and toasted/dried, finely chopped
  • 1/2 cup Bread Crumbs, made from stale bread
  • 1 Tablespoon Honey

Directions

  1. For fresh pasta, cook in salted boiling water for about a minute. Remove the pasta with a slotted spoon and place on a clean towel, do not place on top of each other (or they will stick together). For no boil pasta, if your cheese mixture is quite runny and you plan on letting it sit in the fridge for awhile, the bottom noodles could be used as is. However, I would recommend boiling some (or all if using immediately) of the noodles until pliable.
  2. Butter your baking dish(es). I used two 9x7x2.5 inch casserole dishes, making one for our family and one for a friend. Or you could use one large 10x13 baking dish. Pour about 1/3 cup of heavy cream onto the bottom of the baking dish.
  3. In a large mixing bowl, combine mascarpone, ricotta, 1 cup of heavy cream, 2 cups of Parmesan, salt, pepper, nutmeg, eggs and vinegar. Mix well and set aside.
  4. Place pasta rectangles on top of the thin layer of heavy cream to cover the pan, but do not overlap. On top of the pasta, spread a layer of the cheese mixture. Next add a layer of chopped walnuts. Cover the nuts with pasta and repeat with cheese mixture and walnuts. Continue this layering process until you have used up all the cheese and nuts. Finish with a layer of pasta.
  5. The lasagna can be covered with plastic wrap and left to rest in a cool place for an hour or two or in the refrigerator for longer.
  6. Preheat the oven to 350 degrees. Tear the bread into small pieces and process in a food processor until fine crumbs appear. Mix half a cup of crumbs with the remaining half a cup of grated Parmesan and sprinkle over the lasagna. Bake for 25 to 30 minutes until golden. Allow lasagna to rest for 5 to 10 minutes before serving. Drizzle individual pieces with a bit of honey.
Prep Time: 45 min Cook Time: 30 min Ready in: 1 h 15 min
Click to add this recipe to your Recipe Book
Creamy Honey Drizzled Walnut Lasagna courtesy of Jamie Del Balso.

Did you like this recipe? Find more authentic Italian recipes in this wonderful cookbook.

Tuesday, June 28, 2011

Aunt Melanie's Pasta


Our first CSA box arrived just before our road trip to Florida.  I had to figure out what to do with all of the fresh produce - some of it I was able to freeze, some I gave away and some I brought with us since we were bringing along a cooler and food for meals along the way.  I brought the salad greens and some pac-choi along with us hoping to use it when making meals for our family and grandpa during the week.  Unfortunately, grandpa ended up in the hospital before I was able to make him dinner.  Before we left, Ryan's dad and uncle (and their spouses) came down to be with grandpa in the hospital.  Instead of going out for dinner the last night we were there we ended up raiding the fridge and pantry and making whatever we could think of.  Left-over ribs, salad, and Aunt Melanie's pac-choi pasta dish were a few of the items on the menu.  It turned out to be a lovely meal and I have since made the Choi Pasta for our family - guessing mostly on what the ingredients were.  We served it with a side salad of some salad greens, tomatoes, white beans, Kalamata olives, salt and pepper then drizzled olive oil over the top.  Even the kids loved it!  The result is as follows...

Choi Pasta

1/2 Onion (chopped)
Extra Virgin Olive Oil
Garlic (lots)
2-3 bunches of Choi/Chinese Cabbage (such as Pac-Choi, Joi Choi or Bok Choi)
1- 2 Tablespoons Capers
1/2 lb Pasta (we used farfalle/bow tie)
1-2 oz Parmesan, grated
Salt and pepper to taste

Begin by heating a pan over medium heat, add EVOO and chopped onion when pan is hot.  In another pot boil water and a sprinkling of salt for pasta (about half a box should do it), cook according to package directions.  While the onion is cooking, thoroughly wash the choi and chop.  When the onions have softened and are starting to brown, add garlic - crushed or sliced and quickly add wet chopped choi and cook until wilted.  Season choi with salt and pepper, add capers and more EVOO - enough to coat pasta.  When pasta is done cooking, run it under cold water to stop it from becoming mushy.  Add the pasta to the pan with the choi and stir until ingredients are fully mixed.  Top with grated parmesan.

Side notes:  I had some garlic scapes, so I chopped those up and added them with the onions then added some crushed garlic (at least three cloves).  You may want to try adding some toasted pine nuts to this dish for a little more protein.  I thought it would go well with it, but have not tried it.

For a printable version of this recipe, click on the recipe title above.

Thursday, March 17, 2011

"Irish" Potato Soup


Okay so this isn't really an Irish recipe, but since it is St. Patty's day and all I thought this soup would be appropriate.  For those of you that do not care for corned beef and cabbage, maybe you could make some Potato Soup and a cabbage salad for dinner with some Irish soda bread.  The nice thing about Irish soda bread is that it uses baking soda instead of yeast - so you can make it quickly and easily for dinner tonight!  I did find a site that specified if it has raisins, eggs, shortening, sugar or baking powder in it - that is not soda bread (that is cake).  Here is a nice Irish Soda Bread recipe that I think I've tried and enjoyed.

A few months ago I found myself with lots of potatoes from our CSA and had an urge to make potato soup without bacon, I'm not much for the stuff, but Ryan loves it.  So, I set out to find a healthier option for potato soup.  My cousin sent me her recipe which I did take a few ideas from, but the main recipe I chose came from EatingWell (a great magazine and website for finding healthier recipes).  And the results were fabulous - still smooth and creamy with lots of taste, but without the extra fat found in most recipes.  UPDATE: I'm not so afraid of full fat dairy anymore and HERE is why. It froze well too, I just had some left-overs yesterday for lunch.  The water had separated, but once it was heated up and stirred it was as good as the first time, if not better.  Freezing seems to add flavor to soups.

This happens to be under their Budget Friendly Recipes category and can easily be made vegetarian.  Anyway, on to the recipe...

"Irish" Potato Soup
Ingredients
1 tablespoon butter
1 tablespoon extra-virgin olive oil
1 medium onion, chopped
1 stalk celery, chopped
1 carrot, chopped
2 large cloves garlic (or 4 small), chopped
1 teaspoon chopped fresh thyme or parsley
5 cups chopped peeled potatoes
2 cups milk or cream or half and half (whatever you have)
4 cups reduced-sodium chicken broth or vegetable broth
1/2 teaspoon sea salt
Freshly ground pepper to taste
shredded cheese (optional)
chopped ham or crumbled bacon (optional)
sliced scallions (optional)
Preparation
Over medium heat melt butter and oil in a Dutch oven or soup pot. Cook onion, carrot and celery; stirring occasionally, until softened, about 4 to 6 minutes. Add garlic and thyme (or parsley); cook, stirring, until fragrant, about 10 seconds.

Stir in potatoes. Add  broth and milk; bring to simmer over high heat. Reduce heat to maintain simmer and cook until very tender, about 15 minutes.

Puree the soup in batches in a blender until smooth (do not use a food processor - it is not meant to handle large quantities of liquid). (Use caution when pureeing hot liquids.) Salt and pepper to taste, if you are using your own unsalted broth, you may need to add quite a bit more salt at this time.

Serve with shredded cheese, chopped ham or crumbled bacon and sliced scallions.

Notes:  This can easily be made vegetarian by using a vegetable broth or by making your own vegetable bouillon.  And to make this vegan, change the milk to water and the butter to more oil and only add scallions as a topping.

UPDATE: I made this yesterday and didn't have time to cook the onion, carrot and celery first. I threw everything (minus butter, olive oil and milk) into the crockpot and turned it on high for two+ hours. When I got home from my appointment I added cream and blended it. Then I browned some butter and added that to the finished soup - DELICIOUS!

Oh and my favorite cabbage salad is so simple - thinly sliced cabbage topped with sliced avocado and drizzled with extra virgin olive oil and balsamic vinegar, salt and pepper to taste.  Delicious and so simple!

Thursday, February 3, 2011

Variety is the Spice of Life


I know many of you might be turning up your nose to tofu, but then again many of you may have tried it and liked it or not entirely enjoyed it or you could be one of the few that actually eats it quite regularly. We kind of go in spurts in our household as there are a handful of recipes that I have found that we enjoy. My son actually loves it (he is only 21 months)! I was trying to incorporate it into our meal plan on a weekly or bi-weekly basis, but lately it has been much less. Partly because my freezer is well stocked with venison and that has now become a meal priority! We do, however, have at least one meat-free meal each week.

There are many benefits to tofu - it is usually cheap, stores for quite a while and is extremely versatile (in addition to all the other things you've probably heard/read about soy). Recently, however, I have discovered that there are some issues with unfermented soy products as well as Genetically Modified soy (or anything GM for that matter). I guess my motto is - Variety is the Spice of Life! So now we have it about once a month and I try to combine fermented soy with unfermented soy (much of the tofu we find in stores). Okay, now that I've totally scared you, if you don't want to try the tofu in this recipe, it can be replaced with just about any other meat product - chicken, shrimp, beef or pork would be great substitutes. Just don't marinade them as long as I do the tofu!

Some people avoid tofu because of the texture. That is what I love about this recipe, the wheat berries in here add that chewiness that we (omnivores) typically enjoy when eating meat. Some avoid it because of the lack of flavor - which is unfortunate because it can have so much flavor, if prepared well. So, what the hey, give it a try and see what you think! Be sure to look for a non-GM tofu option. Oh and give yourself some time for this one - it takes a bit of advanced prep, you need to start the night before you plan on making this. But in my opinion it is worth it.

The idea for this recipe came from Tosca Reno's book "The Eat-Clean Diet for Family & Kids." After reading her tofu and wheat berry salad recipe I thought hmm, that looks and sounds similar to fried rice - why not add a few more things and make it a meal instead of a salad. So that is what I did and now it has become a family favorite.

Tofu Fried Rice

Marinade:
6 Tbsp light soy sauce or low-sodium tamari
2 tsp fresh ginger root , peeled and minced*
3 cloves garlic, pressed
2 Tbsp oil*
Pinch red pepper flakes
1 tsp agave nectar*
1/4 tsp toasted sesame oil

Other Ingredients:
1 - 12-16 oz pkg firm (or extra firm) tofu
3-4 cups water or low-sodium stock/broth
1/2 cup brown rice (or rice mix/blend)*
1/2 cup wheat berries*
1/4 cup thinly sliced scallions/chives (optional)
1 medium onion, peeled and chopped
1 medium carrot, peeled and chopped
1 medium zucchini, chopped
1/2 cup frozen peas, thawed
2 eggs (or half cup egg whites/egg substitute)
Sea salt and fresh ground black pepper
Sesame seeds (optional)

Preparation:
Place wheat berries in a glass bowl. Cover with about 4 cups water. Put a plate over the bowl and let stand overnight (on counter). Remove tofu from package and drain water. Place on plate lined with several layers of paper towel (or use a skoy cloth or similar absorptive re-usable cloth). Cover tofu with more paper towels or another absorptive re-usable cloth. Top with a plate and heavy items to weight down (and drain) tofu overnight in refrigerator.

In the morning, make marinade by mixing ingredients above. Cut tofu in half so that you have two large thin slabs and place (or other meat) in flat glass dish. Cover with marinade and flip slabs half-way through the day - keep refrigerated. If you plan to use meat, only marinade for about an hour and reserve some of the marinade (about 2 Tblsp) for later use.

Prepare rice and wheat berries. The recipe calls for doing these separately and in the oven, but I do them on the stove and I believe the last time I did them together. If you have a rice cooker you could also use that. The wheat berries will need to be drained before cooking. If you have package directions for your rice - follow that, otherwise I typically double the amount of water/stock per rice (so for here it would be half cup rice to one cup water/stock). For the wheat berries use about 1 1/2 cups water/stock to the 1/2 cup wheat berries. Or if you combine them, use 2 1/2 cups water/stock for both. This will likely take about 45 minutes for the rice and wheat berries to become tender.

Meanwhile, remove tofu from marinade and cut into small bite-sized cubes, reserve marinade (do not do this if using meat/seafood). Sauté onion in a touch of oil in a large non-stick pan over medium heat. Add tofu and cook until starting to brown. Add carrots, zucchini and peas. When carrots are
starting to soften make a "hole" in the center of the pan by pushing the tofu and veggies to the sides. Place your eggs or egg whites or egg substitute in the center of the pan and fry/scramble. When eggs are cooked add rice and wheat berries. Season with salt and pepper and 2 Tbsp of reserved marinade. Plate fried rice and sprinkle with sliced chives/scallions and sesame seeds if you desire.

*My notes: For mincing the ginger, I like to use a microplane grater that I hold over the bowl or measuring cup that I want the ginger in. I rarely measure the ginger (I guesstimate), but if you want to, then I suggest doing it over a separate bowl before adding it to the marinade. The recipe calls for olive oil, but since it is eventually going to be cooked I prefer to use a different oil. I've been trying out new oils - recently sunflower and safflower have been in my cupboards. I suggest you find a "cooking" oil that you like. Why don't I use olive oil for cooking? It's kind of a waste - all the benefits of olive oil are completely lost when you heat it up. What is agave nectar? It is a sugar alternative that is fairly new to the market and of course not without it's own controversies. In essence - sugar is sugar, no matter what form it comes in and sugar is not good for you - period! However, most people want to enjoy life, so we eat a bit (or a lot) of sugar. You could try honey or maple syrup in it's place if you do not want to try agave nectar or don't have it on hand. Agave nectar is more concentrated than these other sweeteners, so you may want to double it, but that is not necessary - I don't even remember using it, but I probably did. Not sure if you like brown rice, we didn't use to. Then I started trying other varieties and mixing them together - then one day it was like, wow this is brown rice? Of course it still doesn't taste like white rice, but it has more flavor than the original stuff that I was getting. So, there are a few options for making brown rice better. What I like to do is go to the co-op and pick from their bulk bins a variety of brown (or colored) rice. My mix usually contains a short sweet brown rice, a longer brown rice, a little bit of wild rice, some red rice and sometimes black japanica rice. You could also add a bit of quinoa, barley, and/or millet. Another option is if you have a Costco membership I hear they have a good mix for a good price. And yet another option is check your local grocery store - they often sell containers of mixed rice. In fact, Mambo Sprouts currently has a coupon for RiceTec, which I've seen at Roundys and Kroger stores. Don't know where to find wheat berries? Unfortunately I don't have a ton of ideas for this. I would check any store that has a bulk section. I have found them at my co-op and other health food stores. Or, if you happen to live in Bangladesh - you should be able to find them in your local market quite easily! :) Hope you enjoy these additional pics from Bangladesh markets (a trip we made before kids, although I'd love to travel with them someday).

This is getting posted earlier than I originally anticipated to make room for some Valentine's Day items next week. I'll be sharing my Red Velvet Surprise cupcake recipe as well as my favorite whole grain cut-out cookie recipe.