Showing posts with label Do It Yourself. Show all posts

Thursday, March 1, 2012

MYO - Liquid Dishwasher Detergent


In the past I had tried a powder version of homemade dishwasher detergent as well as some additions to extend the life of your store bought powder detergents, but haven't been truly satisfied with either of these options that I have tried. Then, I recently came across this simple liquid version which I usually have all of the ingredients on hand, but I was out of two of them. My Seventh Generation dishwasher detergent was nearly gone and I was at Target, where they did not have Castile Soap in bulk or tea tree oil, so I opted for the Cascade gel pack trial things since I had a coupon. BIG MISTAKE! Every time I used one of those things I felt like there was a chemical factory in my kitchen. The smell was atrocious to me. I couldn't wait to get more Castile Soap and tea tree oil so that I could try this new recipe.

Earlier this week I made the liquid dishwasher detergent and so far so good. However, this morning I noticed my glasses starting to get that hazy, cloudy look to them. I may just need to refill my rinse aid with vinegar. Otherwise it will be back to Seventh Generation. UPDATE: I added more vinegar to my rinse aid and the glasses came out clear the next morning.

Have you tried any homemade dishwasher detergents that have worked well for you? Please share if you have; I'd love to try it out.

This post is part of Simple Lives Thursday. Check out these websites for more great simple living tips, ideas and recipes.


Liquid Dishwasher Detergent

Ingredients

  • 1/2 cup Liquid Castile Soap (such as Dr. Bronners)
  • 1/2 cup Water
  • 1 teaspoon Fresh Lemon Juice
  • 3 drops Tea Tree essential oil
  • 1/4 cup White Vinegar
  • 1 handful Baking Soda

Directions

  1. Combine ingredients from Castile Soap through White Vinegar (do not add the baking soda) in a squeeze bottle.
  2. Shake to mix thoroughly.
  3. Use one Tablespoon in each of the automatic soap dispenser compartments.
  4. Sprinkle a handful of baking soda over the dirty dishes and in the bottom of your dishwasher; this will help absorb odors and increase the cleaning capabilities at the beginning of the washing.
  5. Be sure to use white vinegar in your rinse aid.
Prep Time: 10 min Cook Time: 0 min Ready in: 10 min
Click to add this recipe to your Recipe Book
Liquid Dishwasher Detergent courtesy of Jamie Del Balso.

Thursday, February 2, 2012

Dish Soap Failure or Success?


Last week I promised to share my failed attempt at making dish soap. We had just enough dish soap left to get me to the end of the month, that is until my son decided to use almost half the bottle in doing some dishes, which he promptly emptied the sink and soap after filling it only with water. ERRRR. Anyway, I didn't have plans to go to the store, nor did I have much money left in the household budget, nor did I have a coupon for "Green" dish soap. So, I decided to try and make some. Originally I thought I had failed, but after reading this article on soap nuts, I decided that maybe my attempt had not failed after all. Just because there aren't suds does not mean that there is not soap in the water that is still able to clean my dishes, rather that I've been brainwashed to think that I NEED suds to be able to clean.

I found a recipe that used items I already had on hand - soap shavings, water and vinegar or lemon juice. Sounded easy enough. The kids had fun helping grate the Ivory soap (which is almost always on hand since I use it in making my laundry detergent). The recipe said to cover the soap shavings with hot water and allow it to sit overnight to soften. After a few hours I noticed it had softened and probably should have done something with it then, but the directions said overnight, so I left it. In the morning it was no longer soft - it had now become a semi-solid lump of soap gel. Now the recipe said to add more water and either lemon juice or vinegar (as a degreasing agent) until you reach your desired consistency. Hmm, this lump of soap gel was not changing it's consistency with the added liquids. Now what? I decided to throw it in the blender to see what would happen. Eventually I was able to make it a liquid again and it sure did bubble up with the added motion of the blender. Once it was a liquid I poured it into my almost empty bottle of dish soap, added some essential oils (but could not overpower the scent of the ivory soap) and decided to try it right away. The dish soap created some suds at first, but they quickly disappeared. Which led me to believe that the soap was not working.

If you find yourself in need of some dish soap and want an easy, frugal solution, try this. I figure this cost me at most, 80 cents for the bottle of dish soap. A four pack of Ivory soap was on clearance at Target, plus I had a coupon. Just remember that the presence of suds is not necessary for cleaning. Although I used Ivory soap, you could do this with left over bar soap remnants, hotel soaps or whatever you happen to have on hand or a coupon for. I've changed the recipe a bit from the original since I had some difficulty and a half batch made more than I needed.

Come back next week to find out a simple, non-toxic, counter-intuitive way to get berry, cherry, or wine stains out of fabric.

This post is part of Simple Lives Thursday, check out the link for more ideas for living simply.

DIY Dish Soap

Ingredients

  • 1 cup Soap Shavings
  • 2 cups Hot Water
  • 1/4 cup Vinegar or Lemon Juice
  • 20 drops Favorite Essential Oil (optional)

Directions

  1. Finely chop or grate bar soap remnants, hotel soaps or whatever soap you have on hand.
  2. Cover the soap shavings with hot water and let sit until softened, check after a few hours.
  3. Add more water and vinegar or lemon juice and stir until you have reached your desired consistency.
  4. Add essential oil(s) if using and shake before each use.
  5. Recommended essential oil combinations - orange and lavender, peppermint and grapefruit, bergamot with lavender and orange.
Prep Time: 1 h Cook Time: 1 min Ready in: 1 h 1 min
Click to add this recipe to your Recipe Book
DIY Dish Soap courtesy of Jamie Del Balso.

Wednesday, July 13, 2011

Can't Live Without My Grill


I don't know about you, but in the summer I do most of my cooking on the grill - whenever possible.  I try not to turn on the oven unless it is a cool day or if I need to bake something.  I've been known to don a winter coat and boots to grill in the winter too.  Here is one of my many favorite recipes for the grill.  We use venison, because that is what we have, but the original recipe calls for beef (skirt steak).  Use whichever you prefer.  The recipe that I adapted comes from Cuisine at Home magazine and was a mole recipe, but Ryan isn't much of a fan of the mole - so I took out the cocoa.  Feel free to add it in if you like.  There is a fairly long list of ingredients and things to make, but that's kind of how it is with fajitas and tacos (at least at our house).  The roasted salsa is not necessary, but goes very well with the meat.  You could replace this with regular salsa if you want.  Also the bean dish is not necessary, but it is how we get our meat to go further.

The rub is fantastic, sometimes I make extra and keep it on hand for the next time I want to make fajitas. It would also make a nice "gift" with other spice mixes that you or your family like.  The black-eyed pea salad is a great accompaniment to most mexican meals, makes a nice side dish for summer meals and even tastes great as a salsa on chips.  The original recipe came from Cooking Light magazine.

Grilled Venison Fajitas with Roasted Salsa
Rub ingredients:
2 Tblsp brown sugar (I use sucanat)***
2 tsp each paprika and kosher salt (and cocoa powder if you want it)
1 tsp each ground cumin, garlic powder, and black pepper
1/2 tsp cinnamon

Roasted Salsa ingredients:
1 Tblsp olive oil
2 cups tomatoes, quartered or halved
1 cup red onion, chopped (white or yellow works fine too)
2 garlic cloves
1 spicy pepper of your choice (serrano, jalapeno, poblano all work well)
1 Tblsp fresh lime juice
sea salt to taste

Other Ingredients:
1 1/2 lb venison or skirt steak, trimmed
Vegetables for grilling (onions, peppers, beets, etc.)
Guacamole
Sour Cream
Cheese, grated
Whole wheat or corn tortillas, warmed
Black Beans and corn or Black-eyed peas salad (recipe follows)

Combine rub ingredients in a small bowl and stir to mix.  Rub/pat this mixture onto your meat and refrigerate until ready to grill.  Place the tomatoes, onion, garlic and spicy pepper (if using) in a medium sized bowl and drizzle with 1 Tblsp olive oil, toss to combine.  You can roast these on the grill if you like or in the oven at 500 degrees until starting to brown, about 25 minutes.  If you choose to roast on the grill, remember to rotate them often and only halve the veggies.  While roasted veggies are cooling, prepare (scrap clean) your grill for your meat.  Grill meat about 3 minutes per side (depending on thickness of meat).  Now return to your roasted veggies and throw them in a food processor or blender along with the canned chipotle chile in adobo (if using), the lime juice and salt.  Process until smooth.  Allow meat to rest for about 5 minutes.  Slice into thin strips across the grain.***Recently I've been making the rub without any sugar and I think I actually like it better!***

We like to eat these fajitas on whole wheat tortillas with guacamole (mashed avocado with some garlic, cilantro, lime juice, chopped tomatoes and salt), black beans and corn or black-eyed pea salad (see following recipe), sour cream, grilled peppers and onions, and a bit of grated cheese.

Black-eyed Pea Salad
1 cup fresh black-eyed peas (I use dried, soaked overnight)
1 cup water
1 cup chicken broth
1 cup frozen corn
1/2 cup diced red onion
1/3 cup chopped fresh cilantro
2 Tblsp cider vinegar
1 Tblsp olive oil
1/2 tsp sea salt
2 jalapeno peppers, seeded and minced (may want less depending on level of heat desired)
1 garlic clove, minced

If using dry peas soak overnight and drain water before cooking.  Combine peas, water and broth in a small pan and bring to a boil.  Reduce heat and simmer for about 30 minutes or until tender.  I like to use my crockpot on high to make beans - checking them throughout the day until they are tender, usually takes 2-3 hours (but is unattended for the most part).  Toss frozen corn into peas for the last minute or so to soften.  Mix together drained peas and corn with remaining ingredients.

For a printable version of the recipe, without pictures, click on the title of the recipe above.

Wednesday, April 27, 2011

Do-It-Yourself: Granola Bars


One of my favorite blogs is 101Cookbooks, which is where I came across a recipe for Power Bars, but some of the ingredients weren't very interesting to me, so I set it aside for another time.  I finally got around to making them with a couple of substitutions (for the things I didn't like) and they turned out pretty good, but a bit too sweet and fairly gooey.  So, I tried again and again and again.  All of them tasted pretty good, but were sticky or falling apart or something just wasn't quite right.  I gave up for awhile because I was getting sick of granola bars.  Until one day when we were out of honey - I called up the lady I met at a local farm event who lives just a few miles from our house and has this amazing honey with a cinnamon flavor.  Unfortunately she was out of town, but she told me of a few local places that carried her honey - so I stopped in at a coffee shop to pick some up.  Of course I had to get a chai tea latte while I was there, how could I resist.  Anyway, while I was ordering my latte, they had samples of a homemade granola bar that was quite incredible!  It had lots of peanut butter and one of the ingredients listed was maple, so I went home and tried a new version of the "power bars" and came up with my favorite one so far.

Although the one I like has peanut butter in it and quite a bit, you can make it without if you are not a peanut butter fan.  You could also try other nut butters to see if you prefer that taste.  These are quite easy to make and very yummy too.  And, I promise that you will be able to pronounce all of the ingredients - unlike the ingredient list on some store bought granola bars.  And the best thing about it is that you make it what you want.  You add the nuts you like, the dried fruit you like and whatever nut butter or cohesive agent you prefer.


Ingredients:
Oil sprayer
2 cups chopped nuts/seeds (almonds, walnuts, pecans, sunflower seeds, pumpkin seeds)
2/3 cup unsweetened coconut chips
1 1/2 cups rolled oats*
1 1/4 cups crispy brown rice cereal* (or something similar to Rice Krispies)
3/4 cup natural (no sugar added) peanut butter*
1/2 cup brown rice syrup*
1/3 cup maple syrup (not maple flavored corn syrup)
1/4 cup sucanat or sugar
1/2 cup dried fruit (raisins, cranberries, cherries, blueberries, etc.)
1 teaspoon vanilla (optional)
1/2 cup chocolate chips*

Preheat oven to 350 degrees.  In 9x13 inch baking dish toast nuts and coconut for about 7 minutes, stirring once.  When coconut is starting to brown, they should be thoroughly toasted.  Mix nuts, coconut, oats, cereal and dried fruit in a large bowl, set aside.  Spray pan with oil sprayer and sprinkle chocolate chips over the bottom of the warm and now empty baking dish; set aside.  Combine the peanut butter, rice syrup, maple syrup and sugar in a microwave safe bowl or in a saucepan over medium heat.  Microwave until the mix boils, about a minute.  Stir halfway through, add vanilla and then mix again.  Pour the syrup mixture over the oat/nut mixture until evenly incorporated. Press mixture into pan with chocolate chips using wax paper.  Allow to cool and then cut into whatever size bars you prefer.

*Side notes:  To make these gluten free, use gluten free oats and gluten free brown rice cereal. As mentioned earlier, you can use cashew butter or almond butter or any other nut butter in place of the peanut butter.  I have tried making these granola bars without the brown rice syrup, but honey made it too sweet and too sticky.  I believe the brown rice syrup really helps keep these bars together.  If you live in WI and have a Woodmans in your area - start there first, they should have it in the organic/natural aisle and it is more affordable than the health food stores.  If you are in CO, Vitamin Cottage carries brown rice syrup.  As for the rest of you, try Whole Foods, I believe they have it there or if you have a local co-op store or health food store, they should have it as well.  If you do not like peanut butter or other nut butters in your granola bars, then increase the brown rice syrup to 1 cup and eliminate the nut butter.  And you can decide whether or not you want the maple syrup in the granola bar.  The chocolate chips are optional as well.  They do make a bit of a mess on your hands when you eat them, because unlike M&Ms, chocolate is supposed to melt in your hand.  If you mix the chocolate chips into the other ingredients instead of putting them on the bottom, they may just melt in and go unnoticed.  But these are your bars, so do what you want!

To get a printable version of the recipe without pictures, click on the Recipe Title.  Hope you enjoy making your own granola bars.  Your family and friends will love them too!  

Wednesday, March 2, 2011

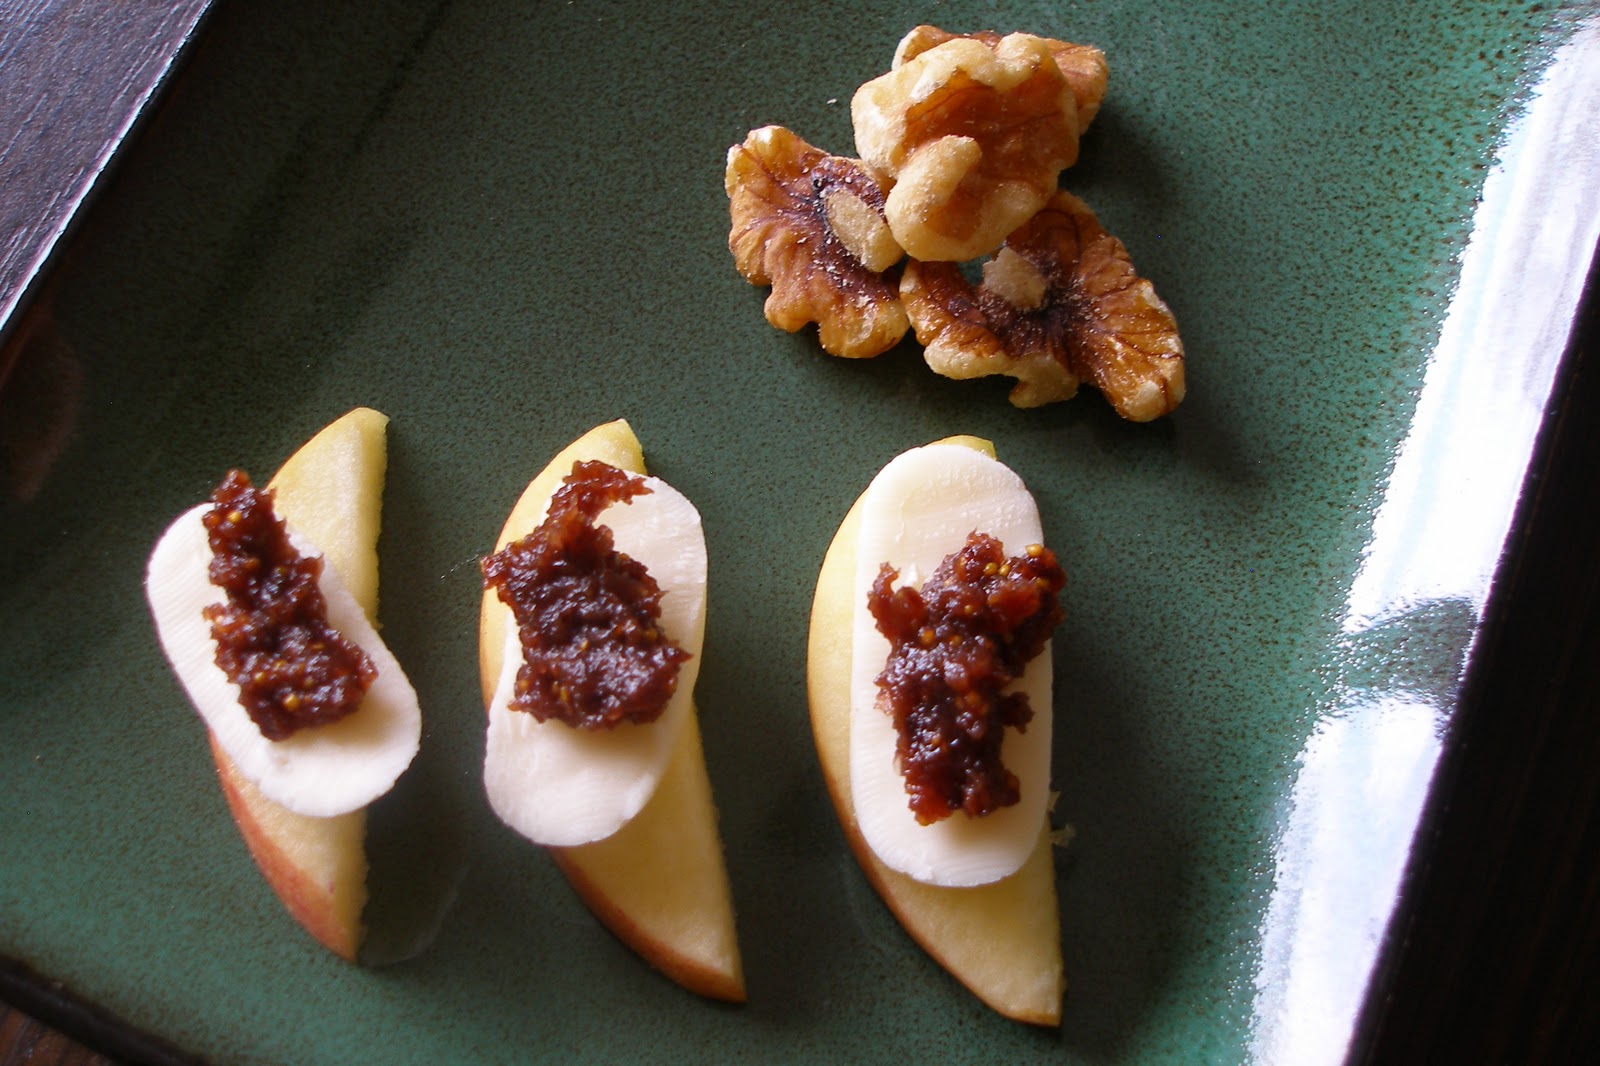
Do-It-Yourself: Fig Spread


What is fig spread and why would I make my own?  Fig spread is just what it sounds like - a spread made from figs.  If you've never had it before, you would likely find it with the specialty cheeses which it is often used with as an appetizer or dessert.  Ryan and I discovered fig spread a few years ago when our local grocery store added a very nice cheese section and had condiments to serve with it's cheese.  We decided to try it and enjoyed it very much.  Last year when we gave up sugary sweets for Lent we occasionally used fig spread on cheese with fruit or crackers as our after dinner "treat" if you will.  Friends of ours from Germany often commented on how sweet and indulgent our "American" desserts were, so I asked what was typical for them.  Their response, an after dinner glass of wine with various cheeses and/or a light fruit dessert.  Hmmm, that is different, but probably much healthier.

Growing up in an evangelical Christian home and church I had not personally experienced the act of giving something up for Lent.  After having children, however, Ryan and I discussed how there seemed to be so much preparation in the church for Christmas during Advent, but not much for Lent (at least not that I knew of).  Ryan started his religious experience in a Catholic church and felt that was one area that they did very well - preparation for Lent and Advent.  In our quest to make some meaningful Easter traditions we decided to give up sugary sweets during Lent last year.   And it most definitely was a time of "suffering" for us.  We struggled through sweet-less weeks and looked forward to our celebration Sundays.  This year we plan to do it again due to becoming addicted to sugar again during the Advent season.  We actually had done quite well decreasing our overall sugar intake until December of last year.  In addition to the experience of calling on God to help us get through our sugar cravings during Lent last year I had some added bonuses of giving up sweet treats - less moody, felt better overall, and at the end the scale showed a very positive result - and I hadn't even given up sugar entirely, just sweet treats Monday - Saturday.

Because Lent starts next week Wednesday I thought I'd share this recipe that I came up with to make my own fig spread.  Fig spreads come in various flavors: orange, coco, pear, etc.  So be creative.


Fig Spread
You will need:
1/2 cup Dried Figs
1/4 cup Dates (preferably whole - which won't contain added sugar)
Squeeze of lemon juice
One or more of the following:
Oranges - to squeeze for juice
Coco powder & Agave
100% juice or nectar with no added sugar
Port wine

First, chop up your figs and dates and place into a non-reactive bowl.  Then add juice to cover (or boiling water if using coco powder and agave).  When figs and dates are fully hydrated, drain excess liquid and place into a food processor, processing until a smooth paste forms.  If using the coco powder and agave, try one teaspoon of coco powder to one tablespoon of agave and taste to determine whether it needs more of one ingredient or the other.  Place spread in a glass jar and store in refrigerator (probably not more than a month) or freeze extra.

I got the idea for this when I made a fig filling for a cookie recipe that called for soaking the figs in port wine and lemon juice.  Unfortunately the cookies were not as tasty as the spread was.  When I made this spread I had some pomegranate juice in my refrigerator so that is what I used - pomegranate fig spread = Delicious!

I know I've had a lot of "sweet" recipes lately, but I probably won't be sharing any during the Lenten season.  Although I do have one more to share for Fat Tuesday/Mardi Gras next week.

Are you giving up anything for Lent?  Please share or join us in our quest to rid our lives of excess sweets!

Click on Recipe Title above for a printable version of the recipe without pictures.

Saturday, February 19, 2011

Do-It-Yourself: Chicken Stock


Maybe some of you already make your own chicken stock or maybe you have been afraid to try. Well, I am here to tell you that it is very simple and extremely cost effective! There are versions of making your own stock that do require a few more time intensive steps, but I tend to go the easy route - otherwise I won't do it. And the end result is always delicious! By the way, your kitchen/house will smell amazing while you are making this.

You will need:
freezable canning jars or storage containers
whole chicken (preferably organic/natural)
veggie scraps
water
vinegar or lemon
sea salt

Step one requires a bit of forethought, but once you start making this a habit it will soon become a natural part of your life. Start collecting vegetable peels/scraps, throw into a storage container or gallon bag and keep in the freezer. Since I buy the dirty dozen and root vegetables organic (as well as the various CSA veggies we get) I save the tops/bottoms of onions along with the peels, carrot peels, potato peels, celery ends, zucchini ends, garlic remains (what is left after pressing through my garlic press) and peels, left-over parsley and other herbs...you get the idea.  However, I don't recommend using cruciferous veggies like cabbage and broccoli.  Once you have collected a good amount of vegetable scraps you are ready for stock making. You can also use a whole onion (along with peel), a carrot, celery stalk, etc. for flavoring your stock if you don't have a collection of scraps and don't want to wait that long.


Step Two: Place vegetable scraps, chicken and parts (if you have misc. parts from other chickens - save those in the freezer for stock making too) and water in a large stock pot - preferably one with a lift out strainer, it just makes things easier. Or you can use cheese cloth for the chicken (wrap it up and tie it off for easy removal). You can also do this in a crock pot, but I prefer to make a larger batch than what fits in my slow cooker.


Step Three: Bring water to a boil, add a splash (about a Tablespoon) of vinegar or lemon juice, and simmer until fragrant (this is when you can sit and relax for a few hours, enjoying the incredible aroma coming from your kitchen) when the chicken falls apart as you lift it out of the pot/water - you know your stock is done. The vinegar/lemon juice sucks the good stuff (and bad) from the bones and adds it to your stock - don't worry, you won't even taste it. This is why I recommend an organic or natural chicken - if you happen to have a sick or pesticide laden chicken that nasty stuff will end up in your stock too.  ***UPDATE: I recommend cider vinegar, red/white wine vinegar or rice vinegar rather than plain white vinegar.  Also, you will get the most nutrients into your stock and out of the bones of your chicken if you let it cook for 24+ hours - I typically use my crockpot now and do several batches.  I do, however, remove the meat from the bones when the chicken starts to fall apart, then I throw the bones back in the pot.***


Step Four: Remove chicken to plate or bowl (I use a tongs and sometimes have a few parts to deal with if the legs or wings fall off). Allow the chicken to cool and strain the veggie scraps from the liquid. This is now when you add salt if you want to. Sometimes I add salt, but most of the time I just wait until I use it in a recipe.


Step Five: Ladel or pour chicken stock into freezable canning jars (wide mouth is preferable) or storage containers. Remember to leave some headspace for the stock to expand when frozen. Label and place the jars/containers in the freezer. If you use plastic storage containers I would recommend letting it thaw in the fridge overnight due to the chemicals in plastic leaching into your food during reheating. As long as you remove the metal rings on the canning jars before thawing, it is fine to put the glass jars in the microwave. Or you can always thaw in the sink in cold water.


Step Six: Remove skin and bones from cooled chicken and discard. Save the chicken and use for a variety of meals: quesadillas, potpie, enchiladas, tacos, soups, an appetizer dip, a pasta dish, etc. Just remember that you have taken most of the flavor out of your chicken and placed it into your stock. So use your cooked chicken in dishes that can be made quite flavorful from other ingredients!

***UPDATE: Once you remove your first batch of stock, add more water to the mix and a bit more vinegar and cook for another 24+ hours.  You will continue to get nutritious bone broth which will likely have less flavor than your first (and potentially second) batch(es) of stock.  I like to use this bone broth for soaked oatmeal, noodles, rice, beans, pretty much anything that calls for water - that way the added nutrients from the bone broth get into our food (without my family realizing it).***

Tuesday, February 8, 2011

Do-It-Yourself: Household Cleaners


So I know this isn't a post you would normally find on a food blog, but the recipes were recently requested by some of my couponing MOPS friends, so I thought I'd share these frugal cleaning recipes that my dear friend Jana compiled a few years ago and that I've added to/tweaked over the years. Most of the recipes come from the book "Better Basics for the Home," which is filled with great ideas for household items that are made from non-toxic materials. The following items will clean most anything in your house and really only take a few minutes (once you have the supplies) put together. They are also much healthier for you and your family. Many illnesses are actually caused by cleaning products (which you will notice often say "hazardous material" on the bottle).

5 Basic Ingredients For Less Toxic Cleaning
1. Baking soda
2. Washing soda
3. Liquid soap (such as Dr. Bronners, I have used Ecover dish soap in some of the recipes too)
4. Vinegar
5. Essential oils

Antiseptic: Capable of preventing infection by inhibiting the growth of microorganisms.
Antibacterial: Anything that destroys bacteria or suppresses their growth or their ability to reproduce.

Lightly Lavender
1-teaspoon essential oil of lavender
2 cups water
*I like to add vinegar in a 1-4 ratio with the water – it is more effective than most industrial cleaners, the lavender helps reduce the sour smell of the vinegar and water alone.
Combine ingredients in a spray bottle, shake to blend, then spray. There is no need to wipe off. Lavender is highly antiseptic. Uses: air freshener (w/o the vinegar), to spray down toys, light switches and countertops

Basic Formula for Antiseptic All-purpose Cleaner
Up to 1-teaspoon antiseptic essential oil (thyme, sweet orange, lemongrass, rose, clove, eucalyptus, cinnamon, rosemary, birch, lavender, or tea tree)
1-teaspoon washing soda
2 teaspoons borax
1/2-teaspoon liquid soap
2 cups hot water
Combine the ingredients in a spray bottle. Shake to dissolve and blend the minerals. I like to spray this cleaner onto a surface, and then leave it for 15 min. or so before I wipe it up with a wet rag, this gives the essential oil's antiseptic qualities time to work. Uses: Great for cleaning the kitchen or bathroom.

Basic Soft Scrubber Formula
1/2-cup baking soda (or borax)
Enough liquid soap to make a frosting like consistency
15 drops essential oil antibacterial essential oil (thyme, sweet orange, lavender, clove, rosemary, tea tree or cinnamon)
Place the baking soda in a bowl; slowly pour in the liquid soap, stirring all the while, until the consistency reaches that of frosting. Add a few drops essential oil and stir that in. Scoop the creamy mixture onto a sponge or rag and wash the surface. Rinse well. Uses: bathtubs, sinks, countertops

Toilet Bowl Sizzler
1/2 cup each baking soda and white distilled vinegar
Pour the ingredients into the toilet. Let sizzle, then scrub. Flush.

All Purpose Window Cleaner
1/4-cup white distilled vinegar
1/2-teaspoon liquid soap (optional)
2 cups water
A few drops of essential oil, for scent (optional)
Combine the ingredients in a spray bottle, and shake to blend. Spray on, then remove with a paper towel (or newspaper – trick to avoid streaks). I prefer to use just vinegar and hot water for windows, mirrors, etc. Uses: windows, glass and mirrors

Basic Wood Cleaning Formula
1/4-cup white distilled vinegar
1/4-cup water
1/2-teaspoon liquid soap
A few drops olive oil
3-5 drops fragrant essential oil (optional)
Combine the ingredients in a glass jar with a screw top. Shake well before each use. Dip rag in formula and squeeze out excess.

Deodorizing Spray
8 drops lavender oil
4 drops each bergamot and clove oil
2 drops oil of peppermint
1/2-cup vodka
1/2-cup water
Combine all ingredients in a spray bottle and shake well. Spritz into air four or five times in areas you feel need freshening.

Laundry Soap (aka Bucket of Boogers)
1 bar Fels Naptha (or Ivory soap)
1/2 cup borax
1/2 cup washing soda
1-teaspoon essential oil (whatever fragrance you like. I like to use the antibacterial or antiseptic)
~You will also need a small bucket, about 2-gallon size~

Grate the soap and put it in a saucepan. Add 6 cups water and heat it until the soap dissolves. Add the washing soda, the borax and the essential oil. Stir until it is dissolved. Remove from heat. Pour 4 cups hot water into the bucket. Now add your soap mixture and stir. Now add 1 gallon plus 6 cups of water and stir. Let the soap sit for about 24 hours and it will gel. You use 1/2 cup per load. If you don't have a big enough bucket you may need to cut the formula in half. You can get big buckets with lids from Target or any hardware store.

Floor Cleaner
1 gallon hot water
1/2 cup vinegar
1 squirt eco-friendly dish soap or Dr. Bronners
essential oils of your choice (optional)

I almost forgot to include this last recipe and I use it all the time. It is also great for cleaning the walls of your shower/tub. I prefer the soft scrub formula for the actual tub.

**If you are using essential oils with little ones in the house, lavender and eucalyptus are very safe! As they get older they can handle other scents as well.

There are so many non-toxic and natural cleaning recipes out there that there is no need to purchase the hazardous materials found in retail stores. Anytime I need to get rid of a stain or clean an item that I don't have a recipe on hand for - I go to the internet to see what I can find. So, get yourself some spray bottles and hop to it! The washing soda might be the most difficult item to find - check the grocery store aisles. I buy baking soda in mass quantity at Sam's Club and the essential oils at a health food store (or I order online - I like the NOW brand, very reasonably priced). Oh and did I mention that this will likely save you money? Not only will you not have to buy expensive cleaners, but your family should be healthier (less money on medications - another blog post and doctor visits). One more benefit - your home will smell wonderful (not like chemicals) when you are done cleaning and you get to pick the scents:)!

If you liked this post, be sure to check back on Thursdays when I add new Recipes for the Home.

Monday, February 7, 2011

Do-It-Yourself: Brown Sugar


Have you ever needed brown sugar for a recipe, but were out and didn't really want to run to the store? Well, if you have sugar and molasses in your cupboards then you don't need to make an extra grocery trip!

Recently Ryan decided to make some chocolate chip cookie dough (not for cookies, just for the dough). He loved the dough so much that when it was all gone he wanted more! Yes, he does realize that he has a sugar addiction and I think I have him convinced to go on a sugar fast with me after his birthday (Valentine's Day). I've been trying to do it without him and it just hasn't been working. Anyway, back to the brown sugar...We happened to be out of brown sugar the second time around and I had completely forgot that in the past I had made my own. After making chocolate tapioca pudding to fulfill our sweet craving, I remembered that I could make my own brown sugar.

What you'll need:
1 cup sugar *
1 -2 Tblsp molasses*

Combine the sugar and molasses and stir until combined. You can get out a handheld mixer or standing mixer if you like, but I used a fork and a mixing bowl and it worked just fine. Store in an air tight container - or use immediately for your recipe. In the past I used white sugar and depending on whether you want/need light or dark brown sugar use more or less of the molasses (2 Tblsp will make dark and 1 Tblsp will make light). If you are using turbinado sugar, 1 Tblsp of molasses will likely be plenty.

*My notes: Recently I started using sucanat (sugar cane natural) and when a recipe called for sugar or brown sugar I just used the Sucanat since the molasses is not separated from the sugar. But for some recipes you need the added moisture and the last time I was at the co-op I decided to try turbinado sugar as it was less expensive than the sucanat that I had been buying. And it was hard to tell the difference between the two on the labels - they both appeared to be "evaporated cane juice." If you want to know more about the differences between the two types of sugars and the benefits of these over white sugar, click on this link. Unsulphered molasses would also be my recommendation for the molasses you choose.

Later this week I plan to use the brown sugar I made for my favorite whole grain cookie recipe. Due to the intense Packer game last night I did not get around to posting my Red Velvet Surprise cupcake recipe today. But I still plan to post that this week in case you would like to make something unique for Valentine's Day!